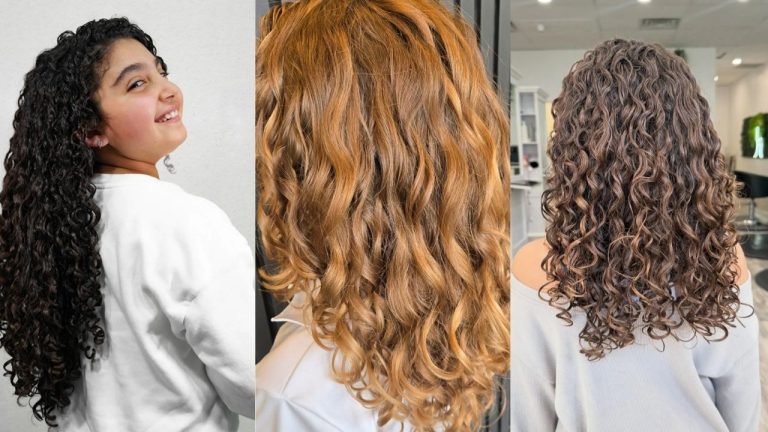
Curly Hairstyles Updo Ideas: 15 Trendy Styles That Wow Instantly
You know that feeling when you wake up, look at your gorgeous curls, and think “What on earth am I going to do with this today?” Yeah, me too. Every curly-haired person faces this daily dilemma, and honestly, sometimes I just want to throw my hair up and call it a day.
But here’s the thing – updos for curly hair don’t have to be boring or basic. Actually, they can be downright stunning when you know what you’re doing.
I’ve spent years experimenting with my own curls (and trust me, there were some disasters along the way), and I’ve discovered that curly hair updos are actually way more versatile than straight hair styles.
Why? Because we’ve got that natural texture and volume that straight-haired folks spend hours trying to achieve with curling irons and texturizing sprays. We’re basically walking around with built-in hair accessories
So grab your bobby pins, maybe a coffee, and let’s chat about these 15 killer curly updo ideas that’ll transform your hair game completely.
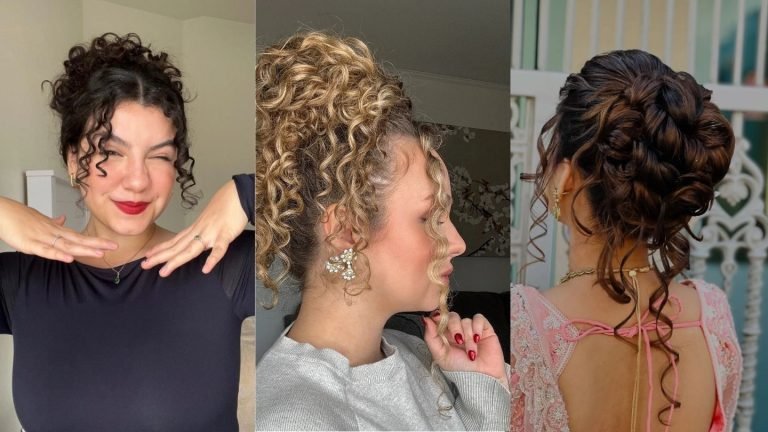
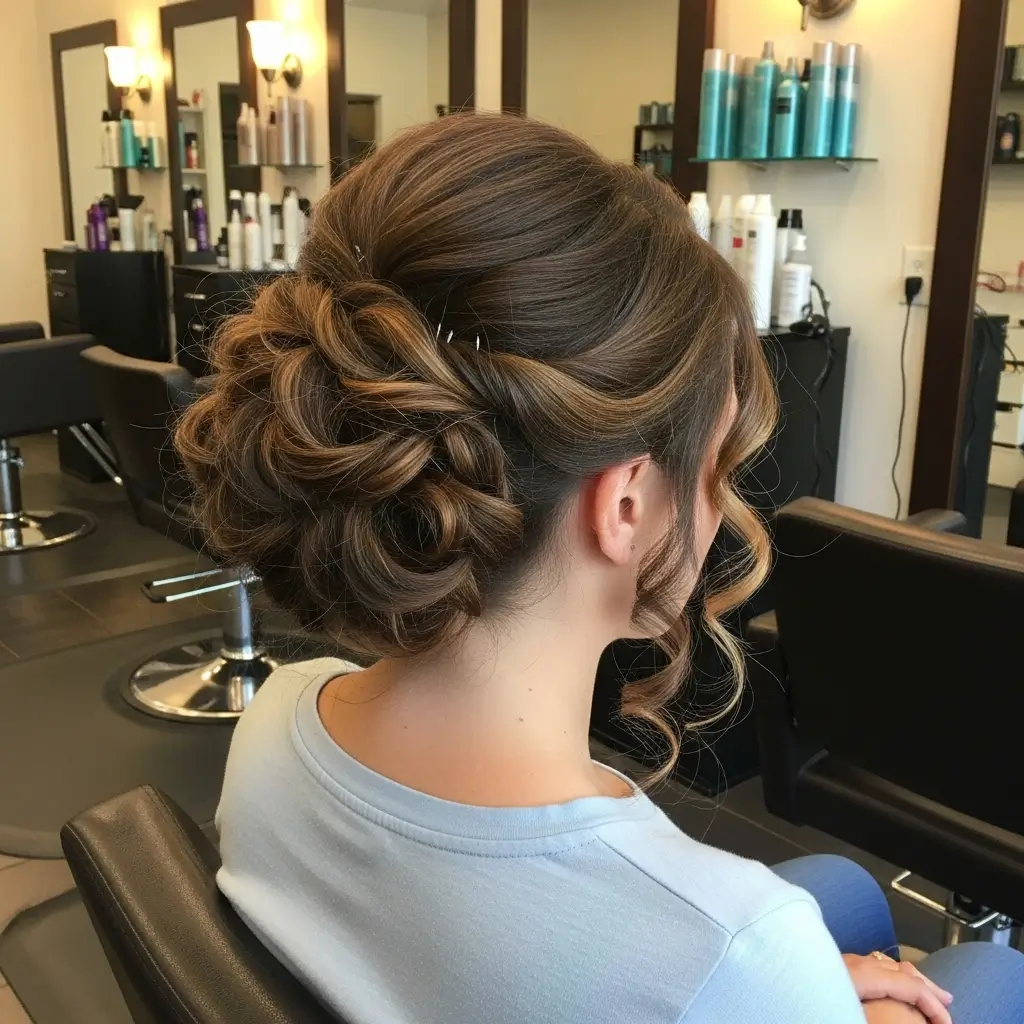
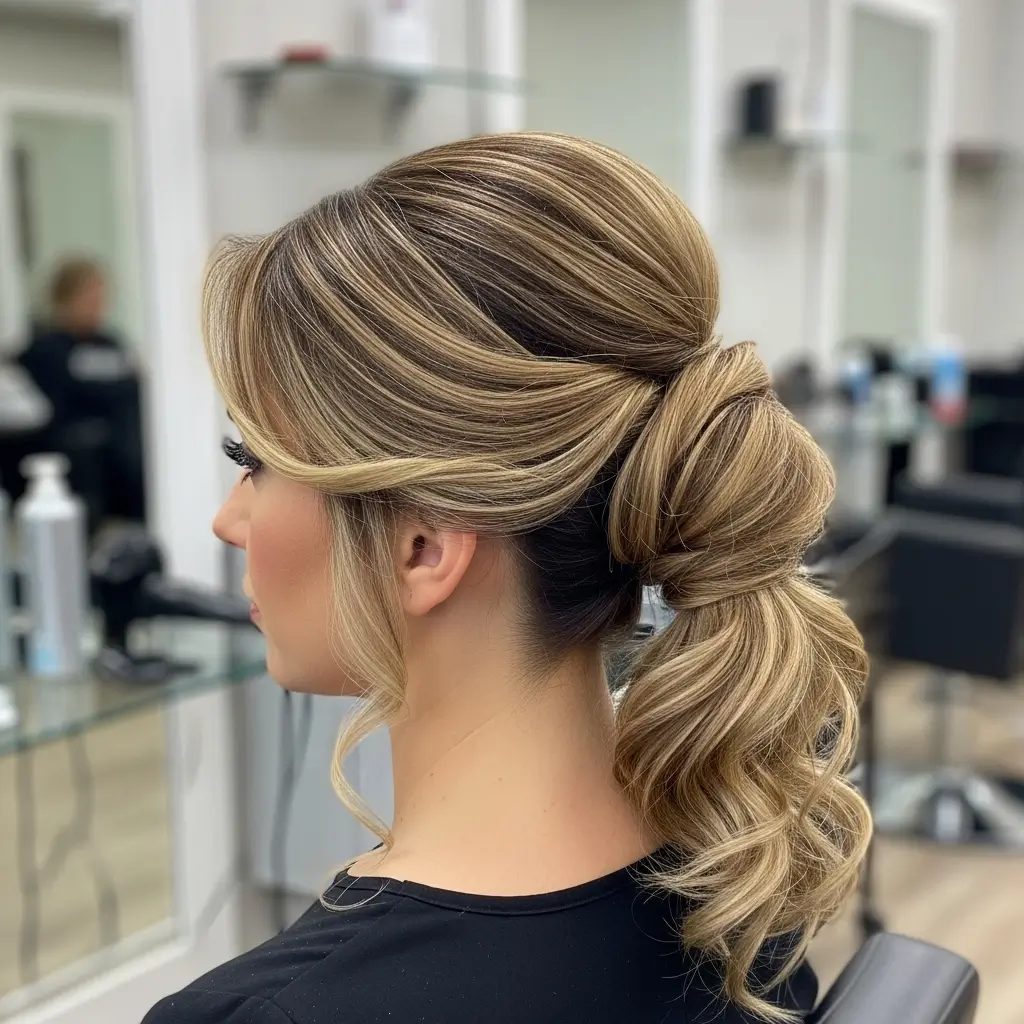
Romantic Low Curly Bun
This style screams elegance without trying too hard. I discovered this gem at my cousin’s wedding when my planned hairstyle fell apart (literally) an hour before the ceremony. Talk about panic mode!
The romantic low curly bun sits at the nape of your neck, creating this effortlessly chic vibe that works for basically any occasion.
You start by gathering your curls loosely at the base of your neck – and when I say loosely, I mean it. The magic happens when you let some curls escape naturally around your face and neck.
Here’s what makes this style work so well:
- Natural texture creates instant volume
- Face-framing pieces soften your features
- Works with day-two or day-three curls
- Takes literally 5 minutes once you get the hang of it
The trick? Don’t overthink it. I twist my curls into a loose bun, secure with bobby pins that match my hair color, and gently tug at sections to create that romantic, undone look. Sometimes I’ll wrap a small section of hair around the base to hide the elastic – fancy, right?
Pro Tips for the Perfect Low Bun
First, never brush your curls before attempting this style. Seriously, just don’t. You’ll end up looking like you stuck your finger in an electrical socket. Instead, use your fingers to gently separate and arrange your curls.
Second, embrace the messiness. Those little flyaways and escaped tendrils? They’re not mistakes – they’re character. I actually pull out a few strategic pieces after securing the bun because perfection looks weird on curly hair IMO.
Half-Up Twisted Crown
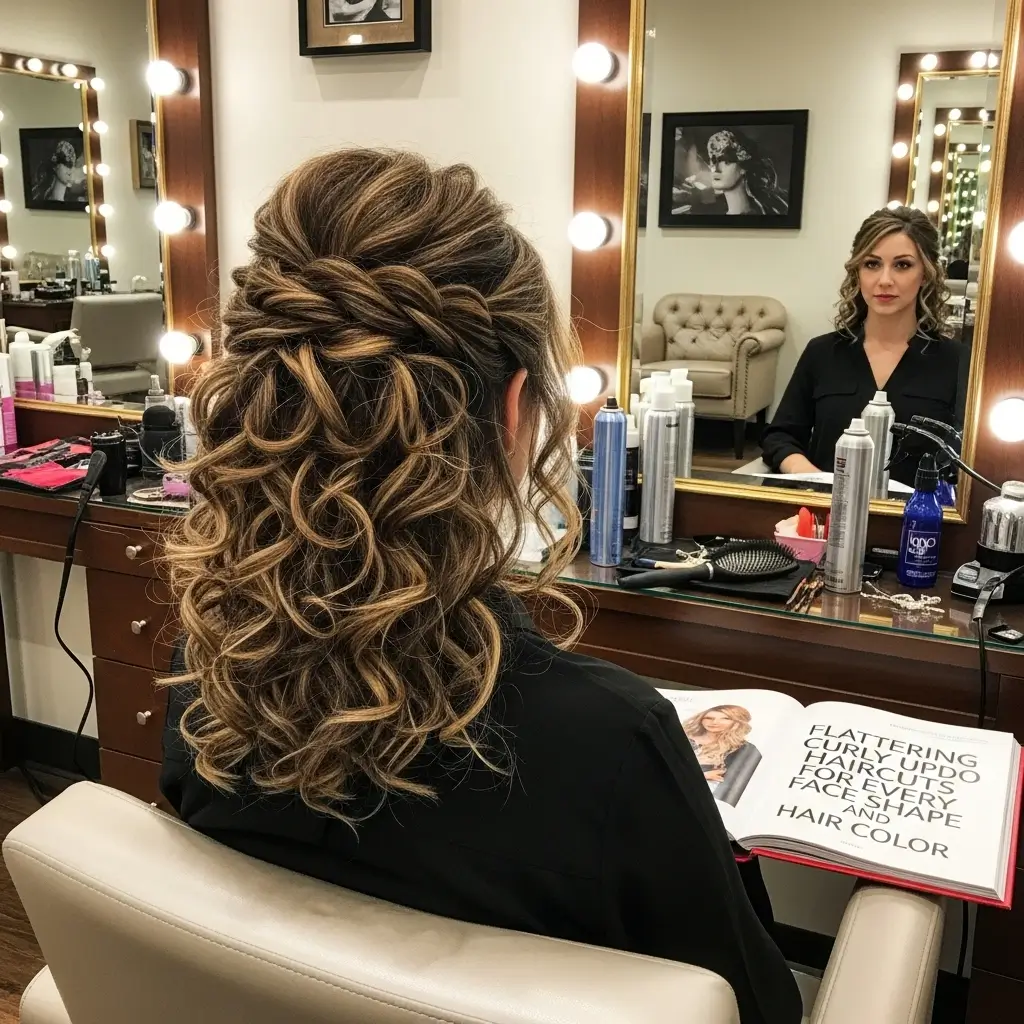
Ever wanted to feel like a goddess without the commitment of a full updo? Enter the half-up twisted crown, my go-to style when I want to look put-together but still show off my curl pattern.
This style involves taking sections from each side of your head and twisting them back to create a crown effect.
The bottom half of your hair stays down, cascading over your shoulders in all its curly glory. It’s basically the mullet principle of hairstyles – business on top, party on the bottom (but way cuter).
What I love about this style:
- Keeps hair out of your face without sacrificing length
- Shows off your natural curl pattern
- Perfect for second-day hair
- Transitions easily from day to night
Making Your Crown Pop
Start with slightly stretched curls for this one. I usually do this style after wearing a pineapple overnight, which gives me that perfect amount of stretch and volume.
Take a section from above each ear, twist it back (not too tight!), and secure at the back of your head with bobby pins crossed in an X pattern.
The secret sauce? Pull gently at the twisted sections to create volume and texture. This loosening technique transforms a basic twist into something that looks professionally styled.
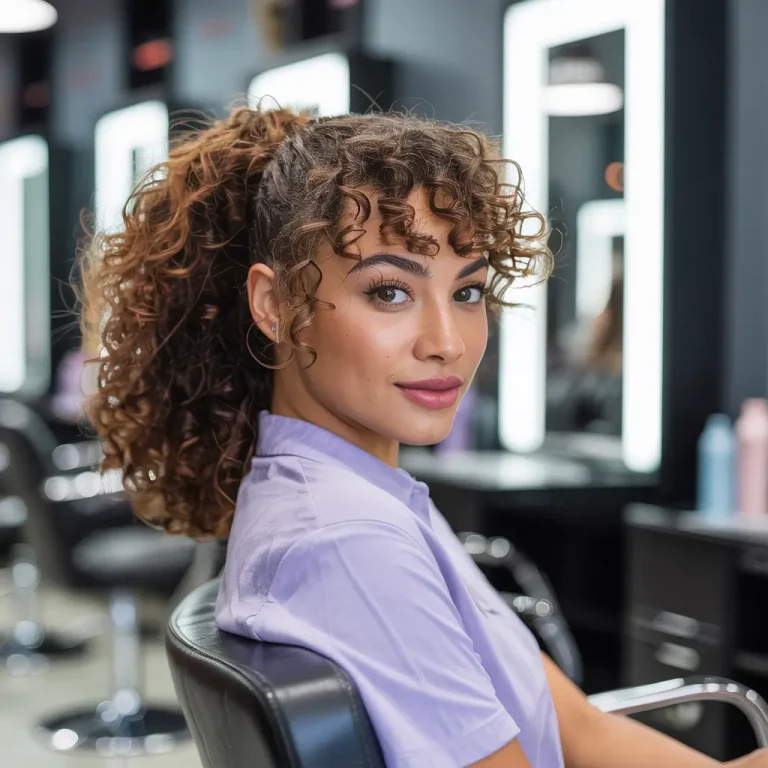
High Puff Pony Updo
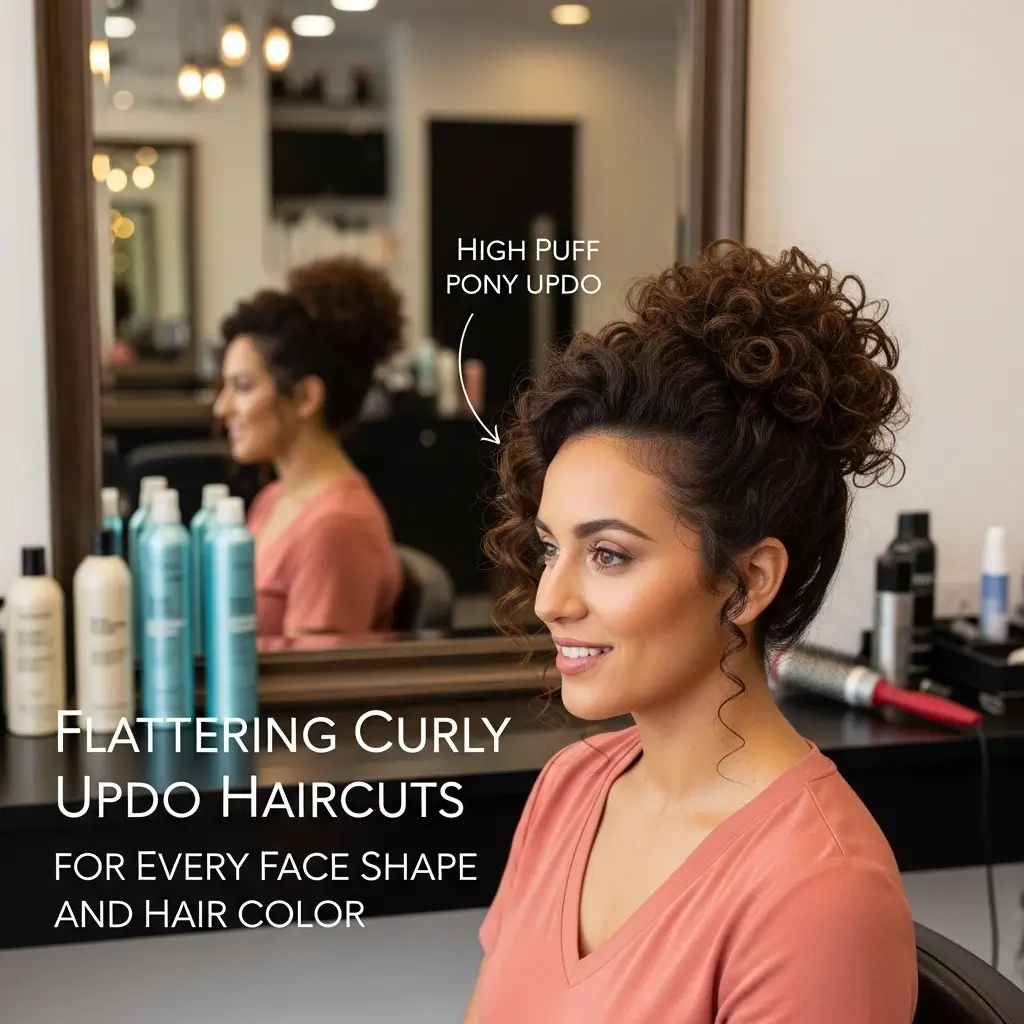
Can we talk about how the high puff is having a major moment? This style takes me back to my childhood, but the modern version is so much chicer than what I used to rock in middle school.
The high puff pony updo combines the casualness of a ponytail with the drama of an afro puff. Position it high on your crown for maximum impact. I’m talking crown-of-your-head high, not middle-of-your-head high.
Why this style rocks:
- Instant face lift effect (no surgery required!)
- Works on all curl types from 3a to 4c
- Can be dressed up or down
- Shows off your cheekbones like nobody’s business
Achieving Maximum Puff
Here’s where things get interesting. The key to a killer high puff is all about the base. I use a thick elastic band and wrap it around multiple times until I get that perfect tension – tight enough to hold, loose enough to not cause a headache.
Then comes the fun part: fluffing and shaping. I pick out the puff at the roots for volume, smooth the edges with a bit of gel if needed, and sometimes add a cute headband or scarf around the base for extra pizzazz.
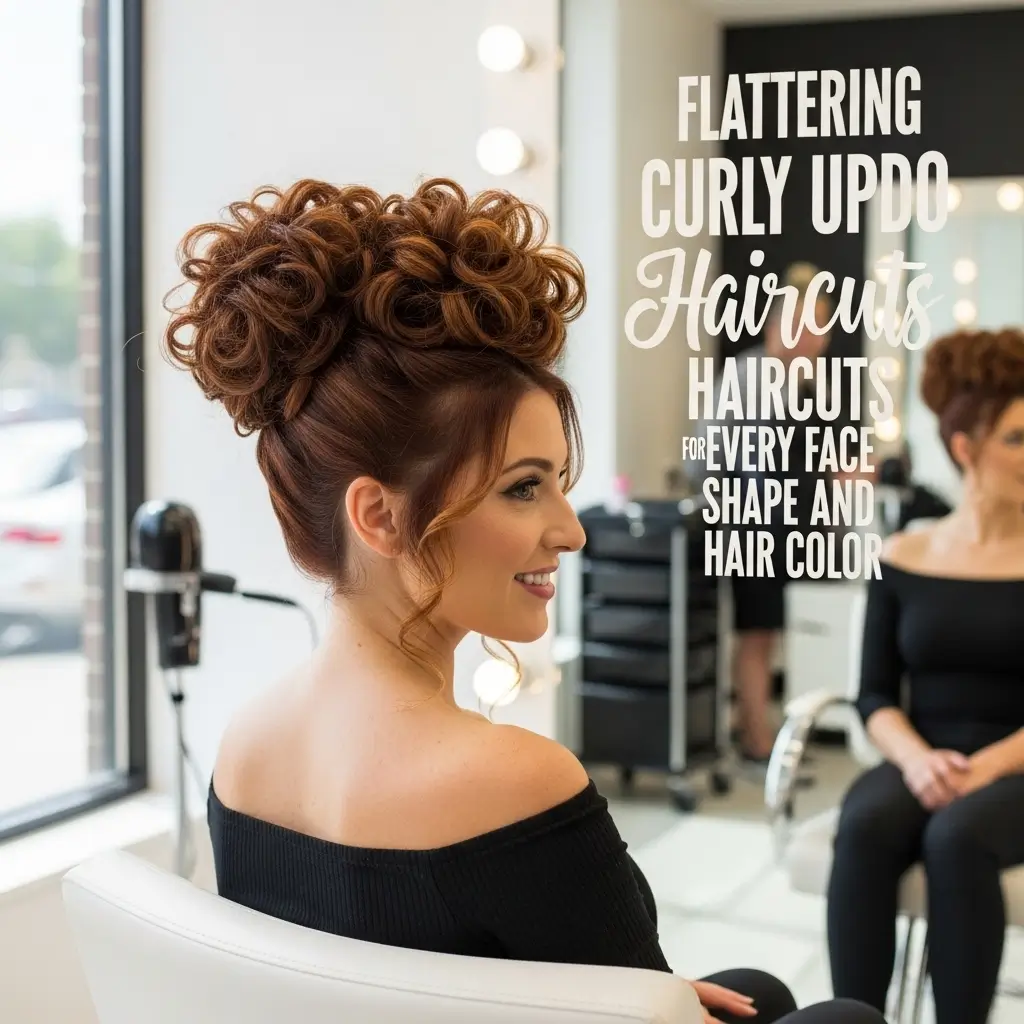
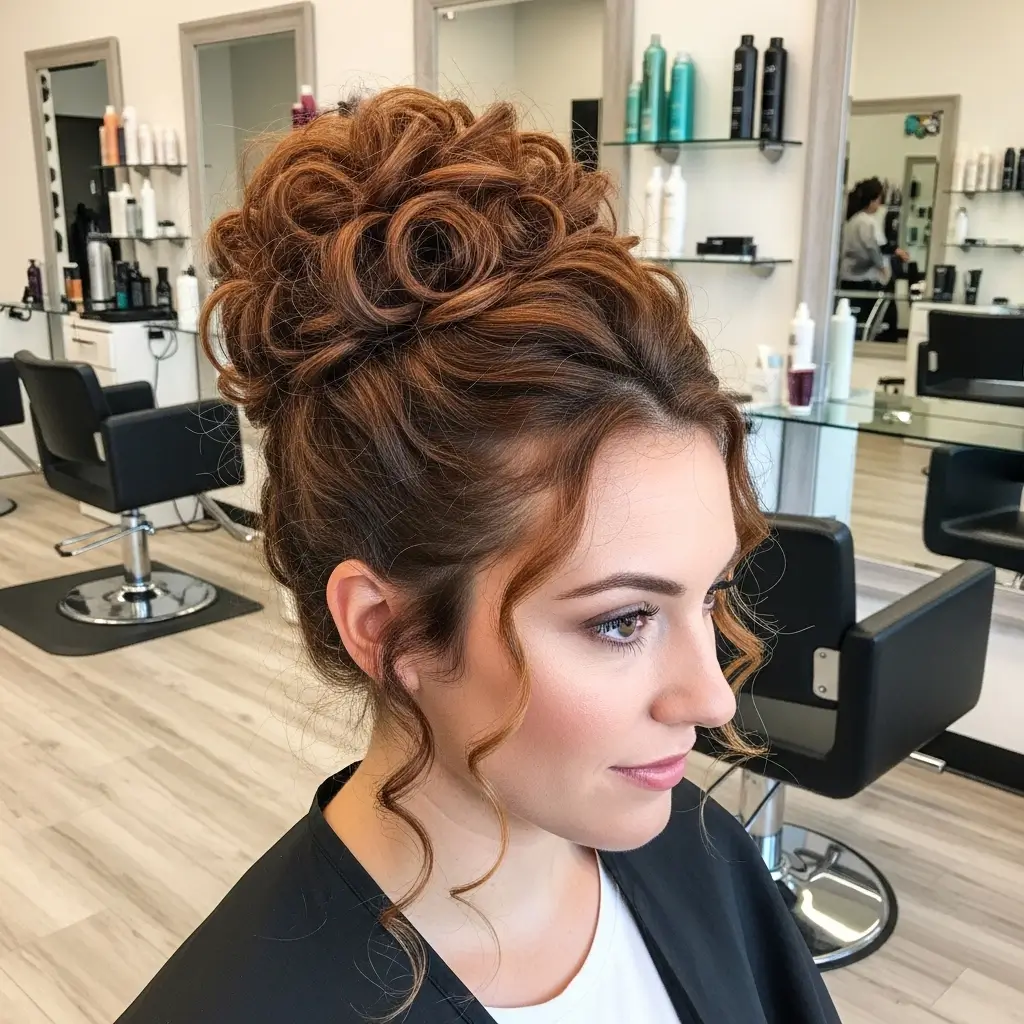
Messy Curly Top Knot
Listen, if you’re not already on the top knot train, where have you been? This style is my absolute savior on those “I can’t even” mornings. You know the ones – when your curls have decided to rebel and form their own government.
The messy curly top knot sits right on top of your head like a curly crown of chaos (in the best way possible). Unlike its sleek counterpart, this version celebrates the natural texture and wildness of curly hair.
What makes it amazing:
- Takes literally 30 seconds
- No tools required except an elastic
- Perfect for wash day or day 5 hair
- Makes you look taller (bonus!)
The Art of Controlled Chaos
Creating the perfect messy bun is actually harder than it looks. Weird, right? The goal is to look effortlessly disheveled, not like you just rolled out of bed (even if you did).
I flip my head upside down, gather all my hair at the crown, and twist it into a bun. The trick is to not secure it too tightly.
Leave some pieces hanging out, let some curls do their own thing, and embrace the imperfection. Sometimes I’ll pull out specific curls to frame my face – strategic messiness, if you will.
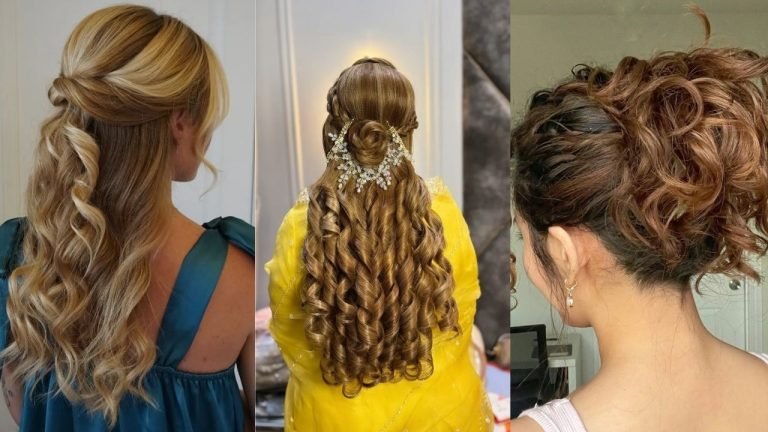
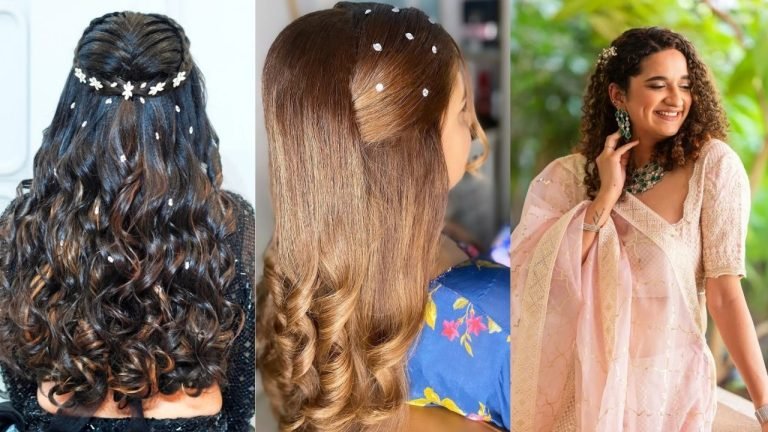
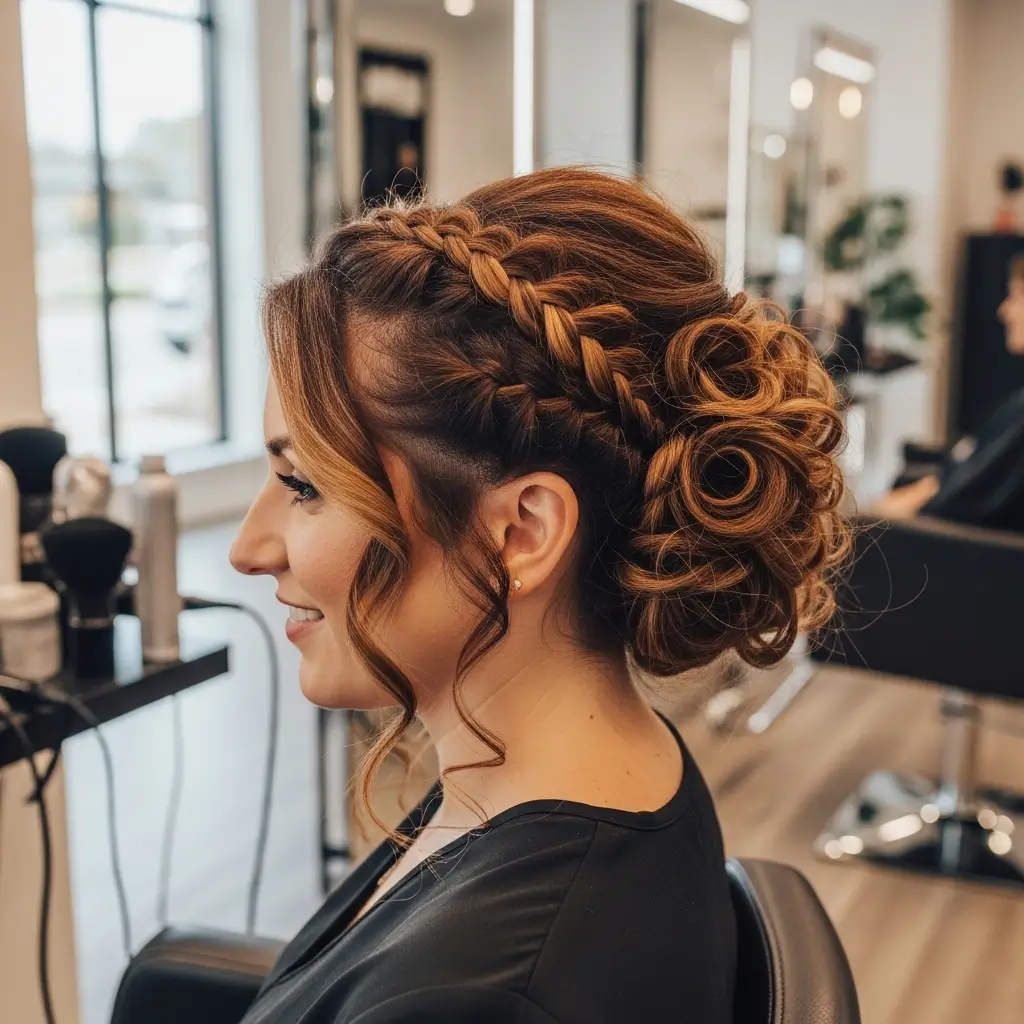
Braided Halo Updo
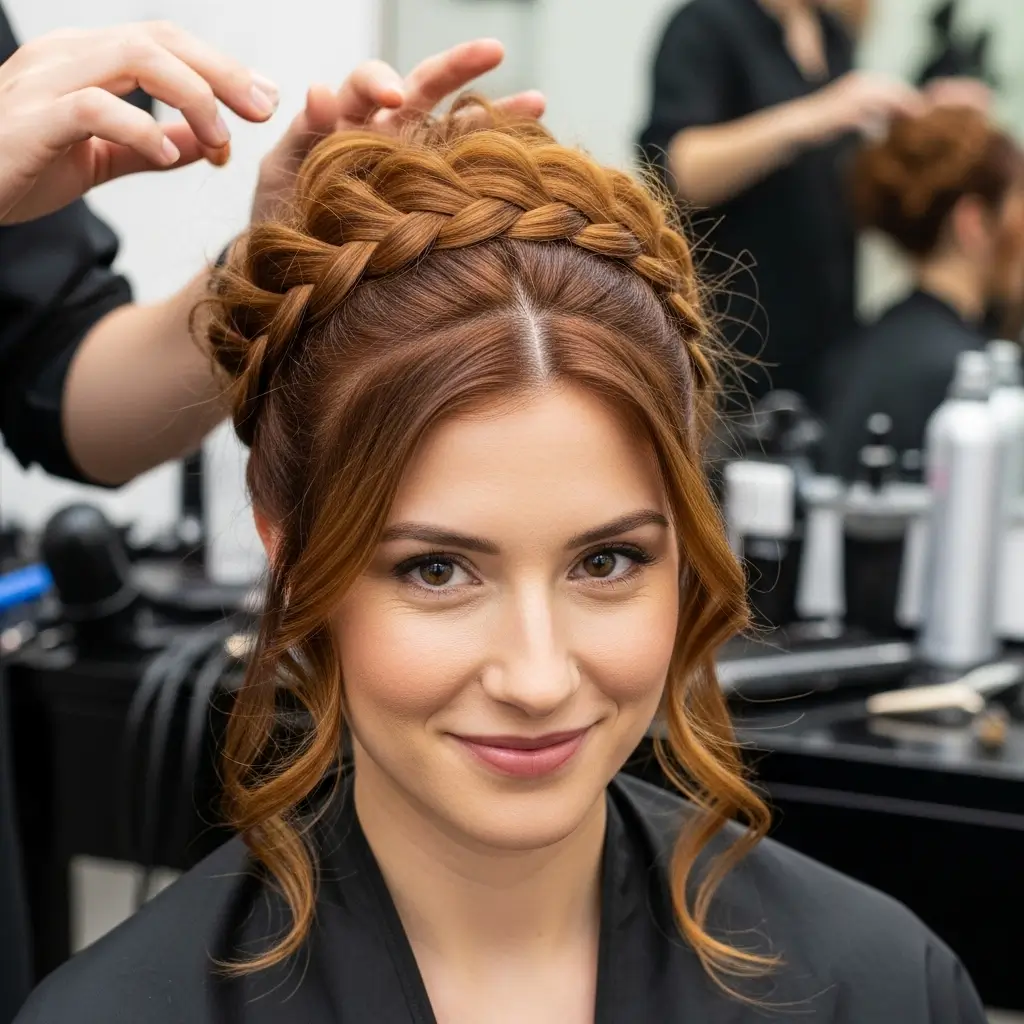
Okay, this one makes me feel like I should be frolicking through a field of flowers or attending a music festival. The braided halo updo creates a crown of braided curls that wraps around your head, and honestly, it’s pure magic.
This style works best with stretched curls or when your hair has a bit of length to it. You’re essentially creating a Dutch braid (or regular braid if Dutch braids make you want to cry) that travels around your head like a headband.
Benefits of the braided halo:
- Keeps every single hair in place
- Lasts for days with proper securing
- Works as protective styling
- Makes you look like you have your life together
Mastering the Halo Technique
Start your braid behind one ear and work your way around your head, incorporating hair as you go. The hardest part? Getting the braid to lay flat against your head without creating weird bumps.
I usually have to redo the beginning section at least twice because I’m a perfectionist like that.
Pro tip: Don’t braid too tightly at the hairline. Your edges will thank you, and you’ll avoid that face-lift look that nobody asked for. Once you complete the circle, tuck the end under the beginning of the braid and secure with approximately 47 bobby pins (or however many it takes to feel secure).
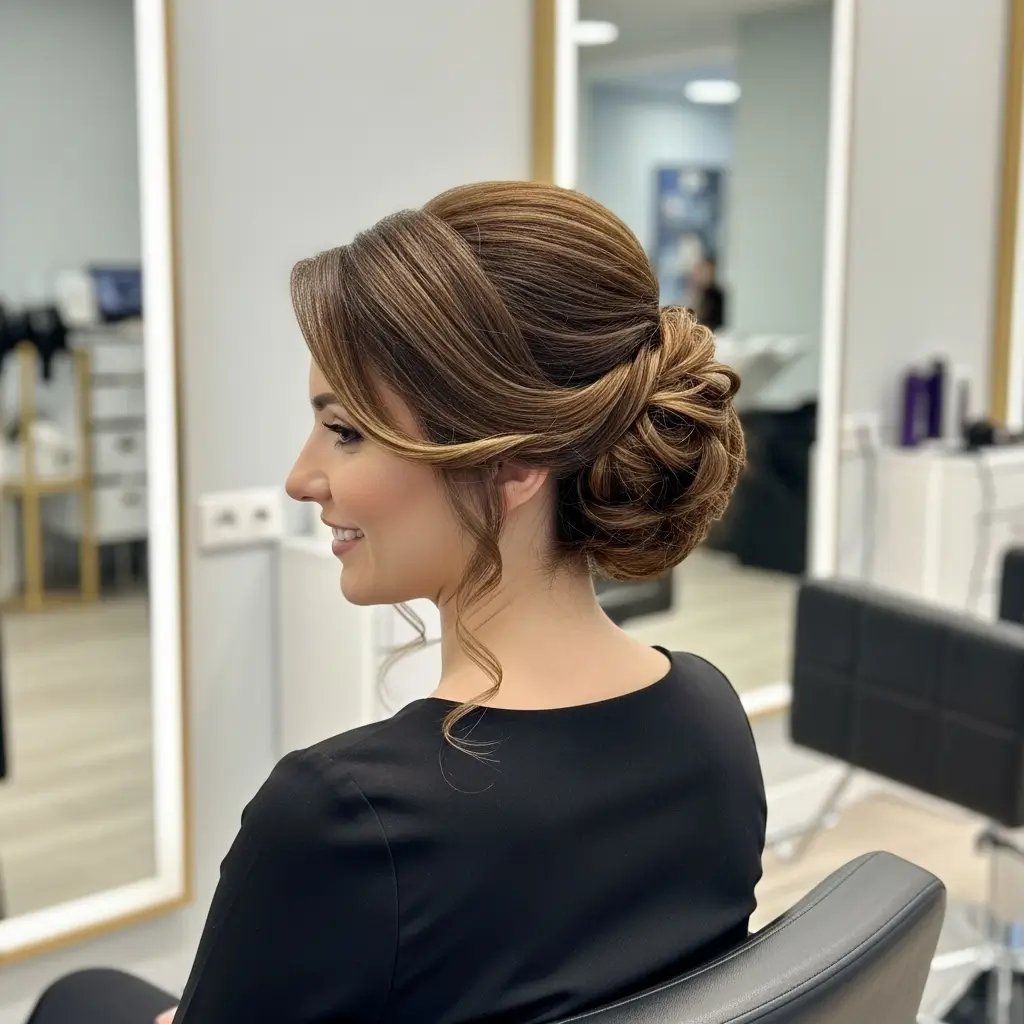
Curly Chignon with Tendrils

The curly chignon is basically the sophisticated older sister of the messy bun. This style whispers elegance while your curls add that touch of whimsy that keeps things interesting.
A chignon traditionally sits at the nape of the neck, but with curly hair, you get this gorgeous textured twist that straight-haired folks could never achieve naturally. The tendrils are key here – they’re not accidents, they’re intentional design choices that soften the whole look.
Why I’m obsessed with this style:
- Perfect for formal events
- Showcases your neck and shoulders
- Works with any curl pattern
- Can be adjusted from sleek to messy
Creating Your Curly Chignon
Start by creating a low ponytail, but here’s the twist (literally) – before securing it completely, create a small opening above the elastic and flip your ponytail through it. This creates an instant twisted effect that looks way fancier than it actually is.
Next, loosely twist your ponytail and wrap it around the base, securing with pins as you go. The beauty of curly hair? You don’t need it to be perfect.
Those little pieces that stick out add character. I always pull out a few face-framing tendrils and sometimes even curl them a bit more with my finger for extra romance.
Side-Swept Curly Bun
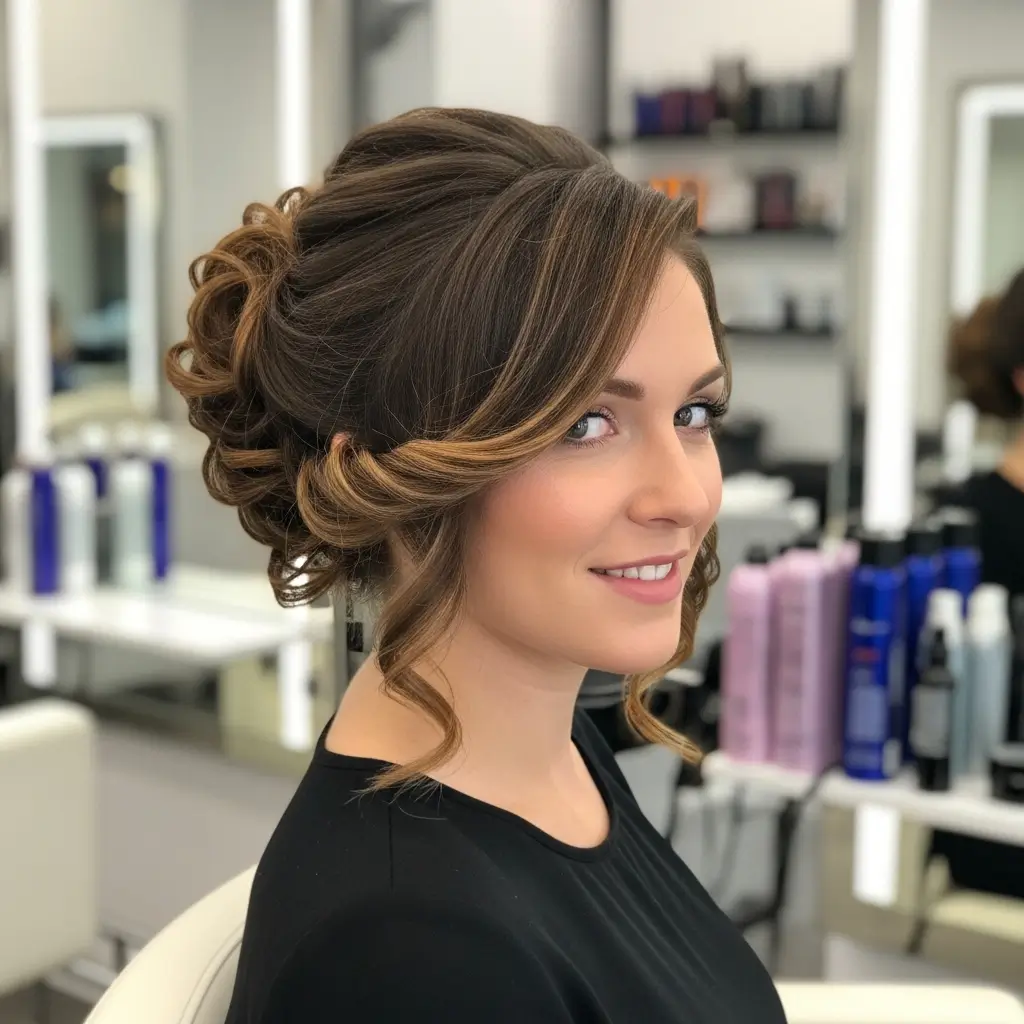
Who says buns have to be centered? The side-swept curly bun is for when you want to add a little asymmetrical drama to your life.
This style sits low on one side of your head, creating this effortlessly chic vibe that works for everything from brunch to black-tie events.
I discovered this style by accident when my centered bun kept sliding to one side (thanks, gravity). Instead of fighting it, I embraced it, and now it’s one of my signature formal styles.
What makes this special:
- Creates an interesting silhouette
- Flatters every face shape
- Easy to accessorize
- Photographs beautifully from every angle
Perfecting the Side Sweep
The key here is commitment – you can’t go halfway with a side-swept style. Pick your side (I always go left because my hair naturally falls that way) and sweep everything over dramatically.
Create your bun low, just behind your ear, and let the natural weight of your curls create that gorgeous swept effect across your head.
Don’t forget to secure the swept section with bobby pins hidden under the top layer of hair. Nothing ruins a good side-swept moment like hair slowly migrating back to center throughout the night.
Double Puff Updo
FYI, the double puff updo is basically space buns’ cooler, more sophisticated cousin. Instead of two buns, you create two distinct puffs that give you this playful yet polished look that I’m absolutely living for.
This style works incredibly well for showcasing curl pattern and volume while keeping things interesting with the dual structure. It’s like your hair can’t decide if it wants to be cute or edgy, so it chooses both.
Double puff perfection includes:
- Symmetrical or asymmetrical options
- Great for shorter curly hair
- Protective style benefits
- Instant personality injection
Creating Perfect Puffs
Part your hair down the middle (or off-center if you’re feeling rebellious) and create two high ponytails. The placement is crucial – too low and you’ll look like you have ears, too high and you’ll look like an alien. Aim for that sweet spot just above ear level.
Once you’ve secured your ponytails, fluff and shape each puff independently. They don’t have to be identical twins – fraternal twins are totally fine. Sometimes I’ll make one slightly bigger or position them at slightly different heights for that intentionally undone look.
Curly Mohawk Updo

Ready to channel your inner rock star? The curly mohawk updo is for those days when you want to make a statement without saying a word. This style creates a dramatic center strip of curls while the sides are sleek or pinned back.
I’ll be honest – the first time I tried this, I felt like I was too extra. But then I walked into that party and received compliments all night, so clearly, extra is exactly what the world needs sometimes.
Why the curly mohawk works:
- Maximum volume and drama
- Versatile styling options
- Works for any occasion (if you’re brave enough)
- Guaranteed conversation starter
Building Your Mohawk
Start by sectioning off a center strip from your forehead to your nape – about 3-4 inches wide depending on your head size and desired drama level.
Slick the sides back with gel or pin them flat with bobby pins. Now comes the fun part: building height and volume in that center section.
I like to backcomb slightly at the roots (sacrilege, I know, but it works) and then arrange my curls upward and backward, securing with pins as needed.
The goal is to create that mohawk silhouette while maintaining your curl pattern. Sometimes I’ll add small braids on the sides for extra edge :/
Loose Curly French Twist
The French twist might seem like something only straight-haired people can pull off, but let me tell you – the curly version is absolutely stunning. Instead of that sleek, tight roll, you get this gorgeously textured spiral that looks effortlessly elegant.
This style took me forever to master because I kept trying to make it too perfect. The secret? Embrace the looseness. Your curls want to be free, so let them have some wiggle room within the structure.
French twist benefits:
- Instant sophistication
- Shows off your hair’s natural texture
- Surprisingly secure once mastered
- Perfect for special occasions
Twisting with Curls
Start by sweeping all your hair to one side and securing with bobby pins in a vertical line down the back of your head.
Then, take the loose hair and begin rolling it inward, tucking the ends into the roll as you go. With curly hair, you’ll need way more bobby pins than tutorials suggest – I use at least 15.
The magic happens when you gently pull at the twist to loosen it and let some curls escape. This creates volume and prevents that severe, pulled-back look that can happen with traditional French twists.
Pineapple Updo for Curls
Every curly girl knows about the pineapple for sleeping, but have you tried the pineapple updo for daytime? This style takes the protective nighttime technique and makes it street-ready with a few simple tweaks.
The pineapple updo sits right at the crown of your head, creating this fountain of curls that cascades down. It’s basically the lazy girl’s guide to looking put-together, and I’m here for it.
What makes the pineapple special:
- Preserves curl pattern
- Creates instant volume
- Works on any hair length
- Transitions easily from day to night
Perfecting Your Pineapple
The key difference between a nighttime and daytime pineapple is the execution. For daytime, you want it slightly neater (but not too neat – we’re not trying to look like a actual pineapple here).
Use a silk scrunchie to avoid creasing, and position it high enough that your curls fan out naturally.
I like to pull out strategic pieces around my face and neck for a softer look. Sometimes I’ll add a cute headband or wrap a scarf around the base for extra style points. The beauty of this style is that as it loosens throughout the day, it just looks better and better.
Elegant Curly Bun with Accessories
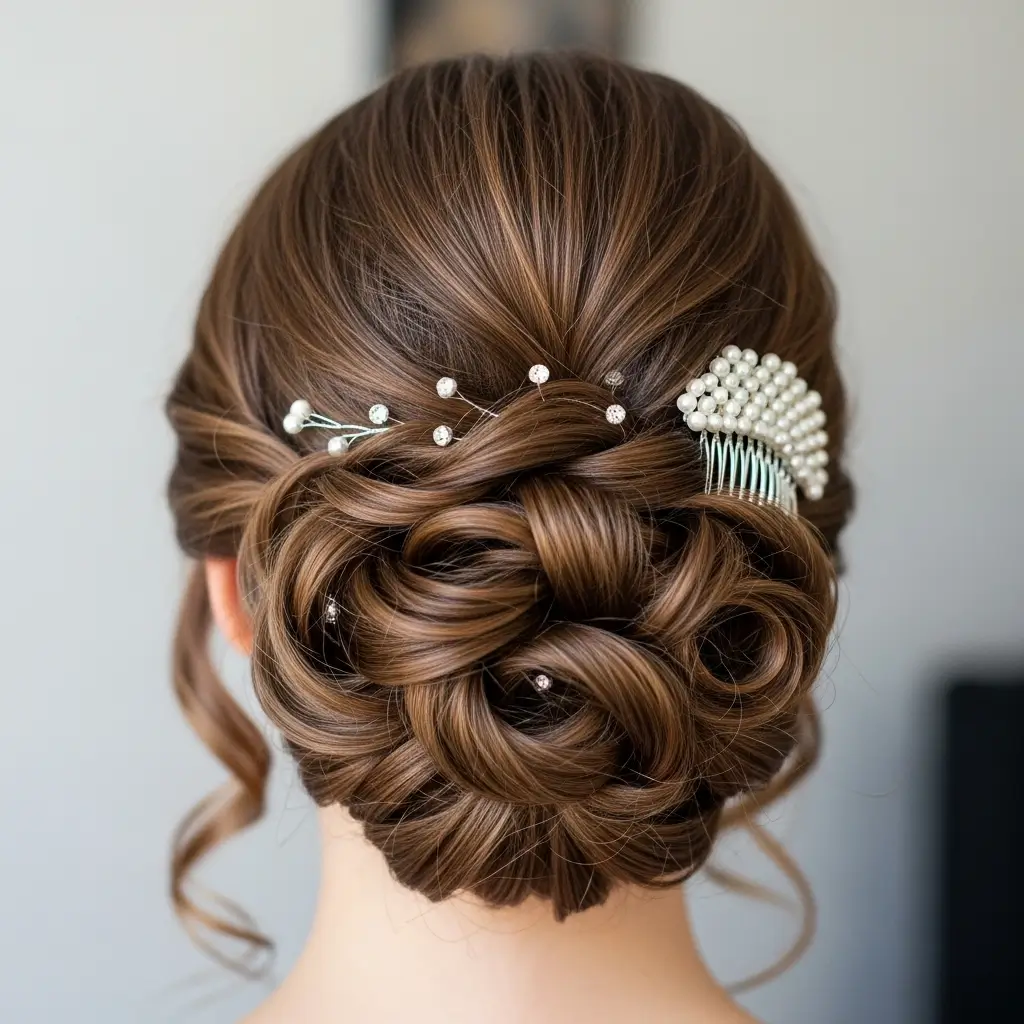
Sometimes your curls need a little extra sparkle, and that’s where accessories come in. The elegant curly bun with accessories takes a simple updo and transforms it into something special with the strategic placement of pins, flowers, or jeweled pieces.
I used to think hair accessories were just for weddings, but honestly, why shouldn’t Tuesday deserve a little glamour? This style lets you experiment with different looks using the same base technique.
Accessory advantages:
- Instant style upgrade
- Covers any imperfections
- Adds personality to basic styles
- Creates focal points
Choosing and Placing Accessories
The trick with accessories is not to overdo it (unless that’s your vibe, then go wild). Start with a basic curly bun – low, high, or side, doesn’t matter.
Then add your chosen accessories strategically. I like to cluster small pins on one side or place a single statement piece at the base of the bun.
Fresh flowers are my summer go-to, while metallic pins work year-round. Pro tip: If you’re using bobby pins as decoration, get the fancy ones.
Those basic brown ones from the drugstore aren’t doing anyone any favors when they’re meant to be seen.
Curly Space Buns

Remember when space buns were everywhere a few years ago? Well, they’re back, and the curly version is even better than the original.
These twin buns sit high on your head like little curly satellites, and they’re perfect for when you want to feel playful and carefree.
Space buns work especially well with curly hair because our natural texture adds instant volume and interest. No need for teasing or texturizing – we come pre-equipped with everything needed for epic space buns.
Space bun benefits:
- Fun and youthful vibe
- Great for festivals and casual events
- Keeps hair completely off your neck
- Can be dressed up or down
Creating Stellar Space Buns
Part your hair down the middle (precision isn’t necessary – wonky parts add character). Create two high pigtails, positioned above your ears and slightly toward the back of your head. Now twist each section and wrap it around the base, but here’s the key: don’t wrap too tightly.
Let your curls do their thing within the bun structure. Pull out pieces, fluff them up, make them as big or small as you want. I sometimes leave a few curls hanging from each bun for that extra whimsical touch. Add glitter, temporary color, or clips if you’re feeling extra festive.
Twisted Low Pony Updo
The twisted low pony updo is sophistication meets simplicity. This style takes the basic low ponytail and elevates it with strategic twisting and pinning that makes it look like you spent an hour at the salon (when really it took you five minutes).
What I love about this style is its versatility. Depending on how you execute it, it can be professional enough for work or romantic enough for date night. The twisted element adds visual interest while maintaining that effortless vibe we’re always chasing.
Twisted pony perks:
- Quick and easy execution
- Stays put all day
- Works with various curl patterns
- Minimizes frizz and flyaways
Mastering the Twist
Start with a low ponytail, but before securing it, take a small section of hair and wrap it around the elastic to hide it – this instantly makes any ponytail look more polished.
Next, divide your ponytail into sections and twist each one loosely, then pin them up and around the base in different directions.
The result should look like an intentional mess of twists and curls. I like to leave some pieces hanging down for movement, and sometimes I’ll braid one section for added texture. The beauty is that no two twisted low ponies ever look exactly the same.
Vintage Pin-Up Curly Updo
Let’s end with something special – the vintage pin-up curly updo. This style channels old Hollywood glamour with a modern twist, creating victory rolls and pin curls that celebrate your natural texture.
This is definitely the most advanced style on our list, but once you nail it, you’ll feel like you stepped out of a 1940s movie poster.
The combination of structured rolls with loose curls creates this incredible contrast that’s absolutely breathtaking.
Pin-up perfection includes:
- Dramatic victory rolls
- Face-framing curls
- Retro glamour vibes
- Guaranteed head-turner status
Creating Vintage Vibes
Section off the front portion of your hair from temple to temple. Create victory rolls by rolling sections toward your face and pinning them in place – this takes practice, so don’t get discouraged if your first attempts look more like hair horns than victory rolls.
The back can be pinned up in various ways – I prefer a low rolled style that complements the front rolls. Leave some curls loose around your neck for that authentic vintage feel. Add a bold red lip and you’re ready to stop traffic.
Wrapping Up Your Curly Journey
So there you have it – 15 curly updo hairstyles that prove our textured hair is anything but limiting. Each of these styles celebrates what makes curly hair special: the volume, the texture, and yes, even the unpredictability.
The best part about styling curly hair? Perfect is boring. Those little flyaways, the asymmetrical bits, the pieces that won’t quite stay put – they’re not flaws, they’re features. They give our styles personality and movement that straight hair could never achieve naturally.
My advice? Start with the styles that speak to you and don’t be afraid to make them your own. Mix elements from different updos, add your own twist (literally or figuratively), and remember that the best hairstyle is the one that makes you feel confident.
Whether you’re rocking a messy top knot to the grocery store or a vintage pin-up style to a wedding, own it completely.
Your curls are unique, and your updos should be too. So grab those bobby pins, embrace the chaos, and remember – if at first you don’t succeed, that’s what dry shampoo and trying again tomorrow are for. Happy styling!