15 Trendy Braided Hairstyles Ideas for a Fresh New Look
Remember that time you scrolled through Instagram for hours, saving every gorgeous braid tutorial, only to end up with the same messy bun the next morning?
Yeah, me too. But here’s the thing – braiding your hair doesn’t have to feel like solving a Rubik’s cube blindfolded.
I’ve spent the last decade experimenting with every braid style imaginable (and creating some questionable ones along the way).
Today, I’m sharing 15 game-changing braided hairstyles that actually work in real life, not just in perfectly lit tutorials.
Whether you’re heading to a music festival, a wedding, or just trying to look put-together for that Zoom call, I’ve got you covered.
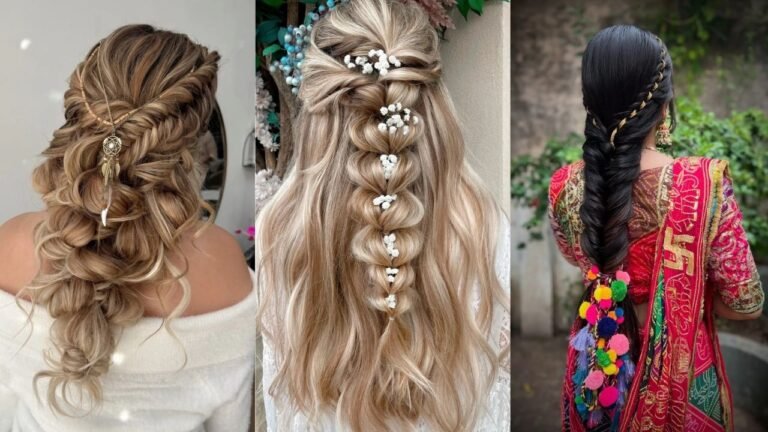
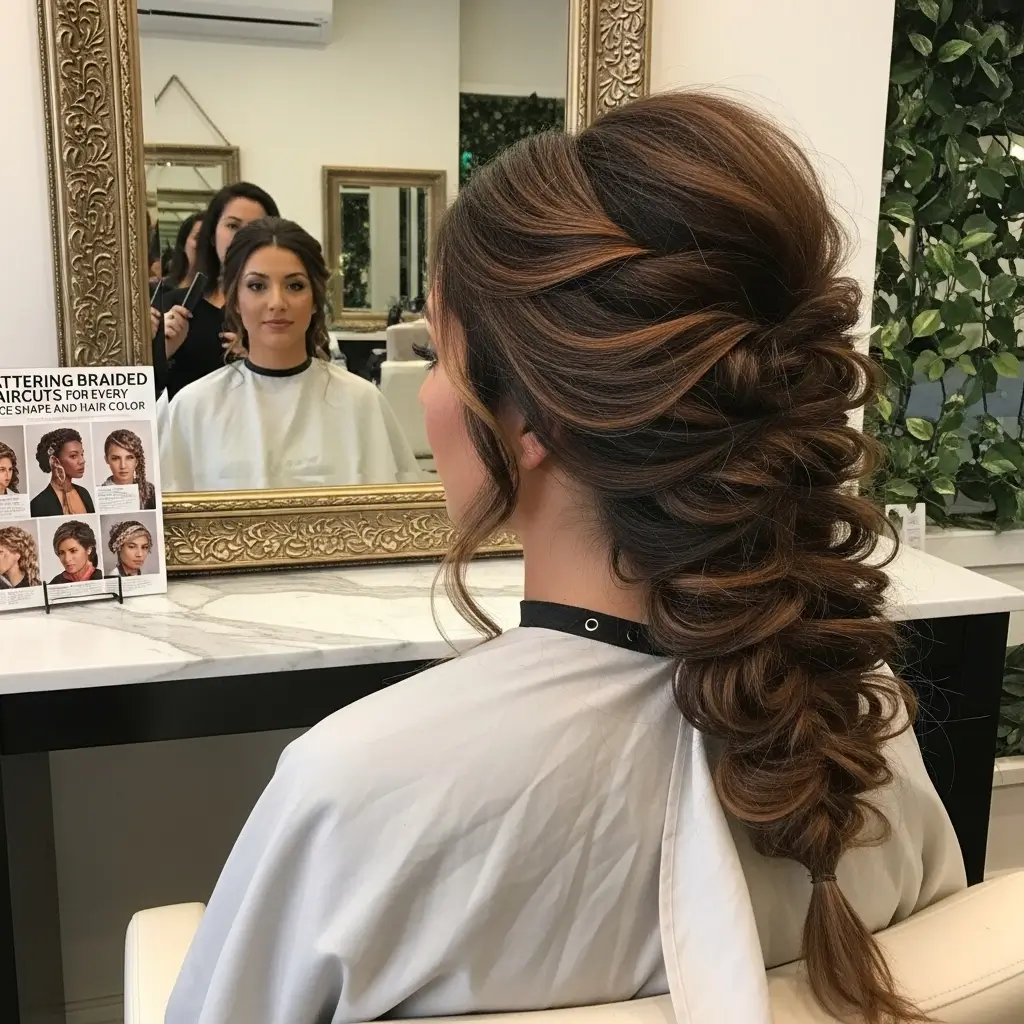
Boho Fishtail Braid Style
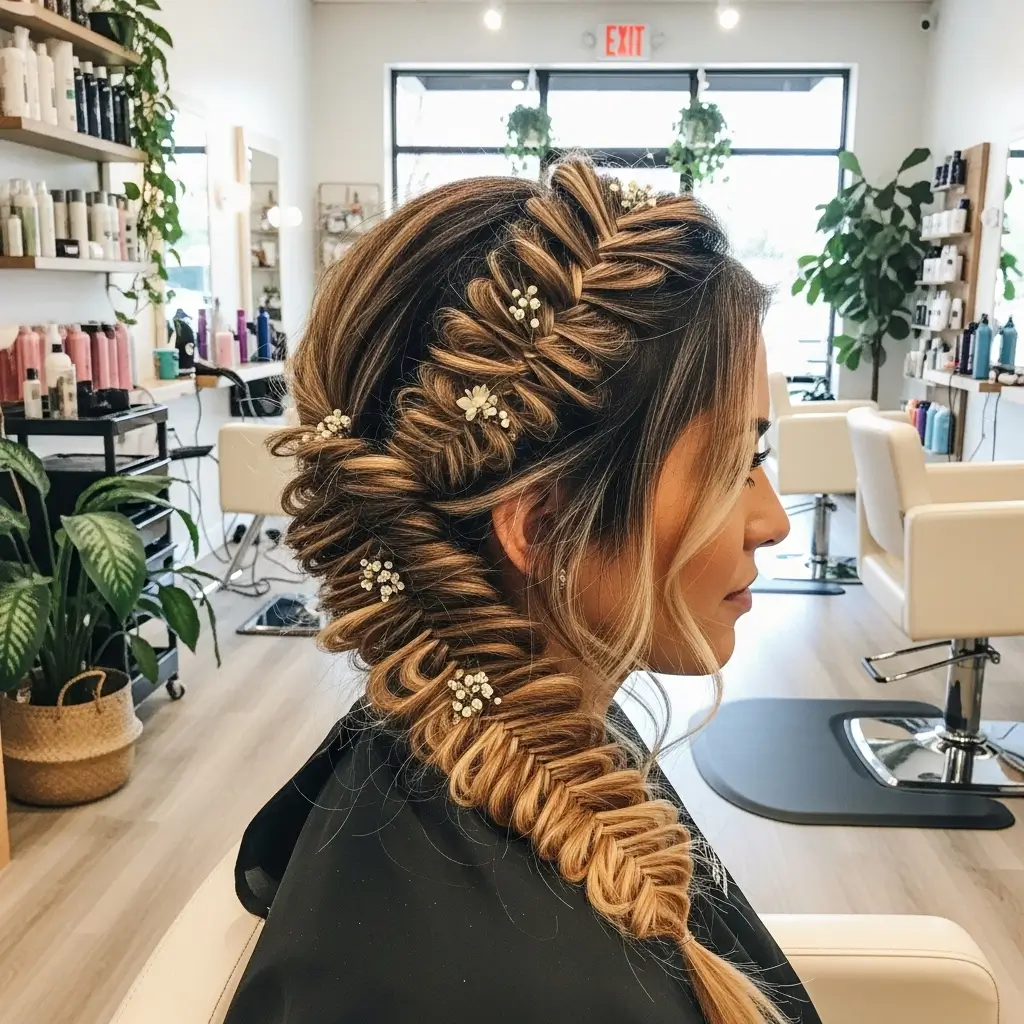
The boho fishtail braid screams effortless festival vibes while secretly making you look like you spent hours at a salon.
I discovered this style during a camping trip when I desperately needed something that would survive three days without washing. Spoiler alert: it did, and I looked amazing in every photo.
Creating this look starts with texturizing your hair. You want that lived-in, beachy texture that makes everything look intentionally messy.
I spray some sea salt spray throughout my hair and scrunch it up – instant texture without the beach trip.
How to Master the Boho Fishtail
The key to nailing this style lies in the tension – or lack thereof. You want to braid loosely, almost carelessly. Here’s my foolproof method:
• Start with slightly dirty hair (day-old hair works perfectly)
• Create a loose side part
• Begin your fishtail braid lower than you think you should
• Pull apart sections as you go for that chunky, undone look
• Leave the last few inches unbraided
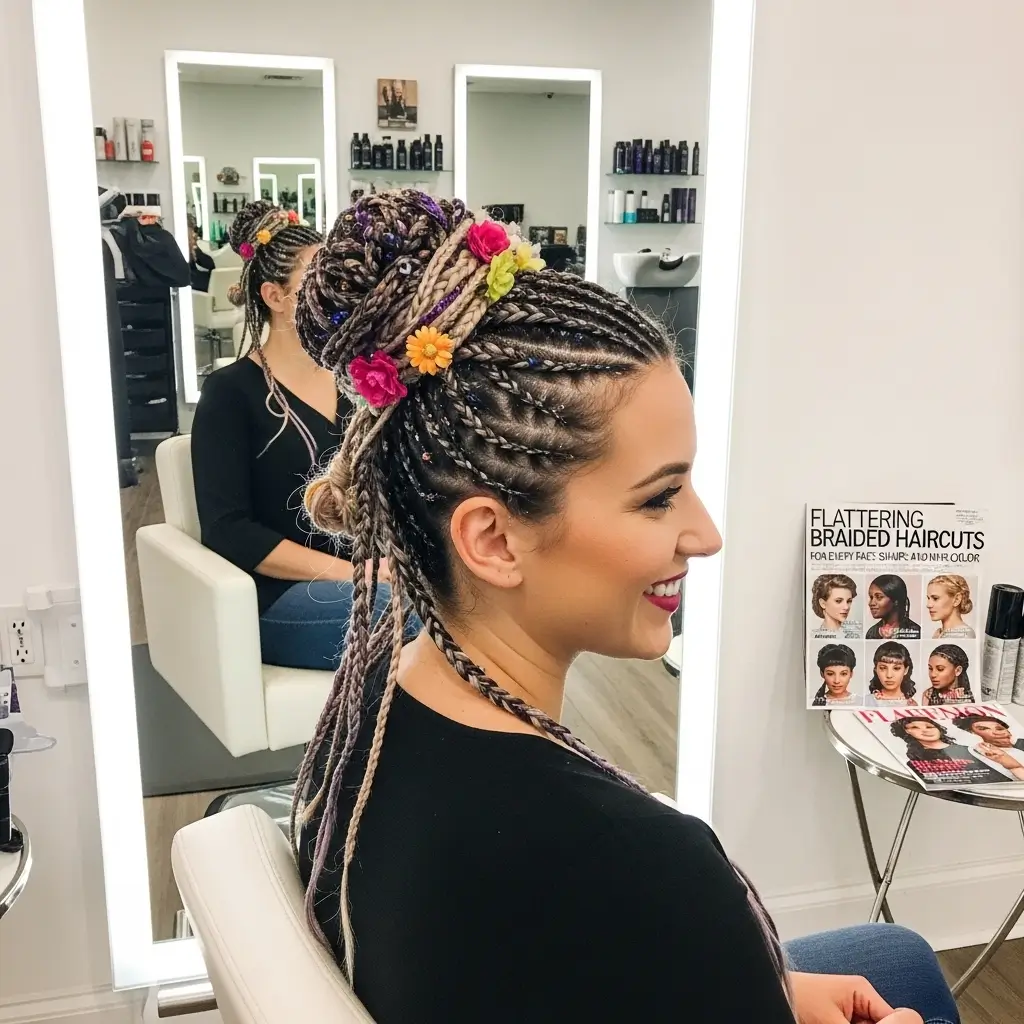
What makes this style truly boho? The accessories, obviously! I love weaving in small wildflowers, adding hair rings, or wrapping sections with thin leather cord. The messier it looks, the better it photographs – trust me on this one.
Romantic Dutch Crown Braid
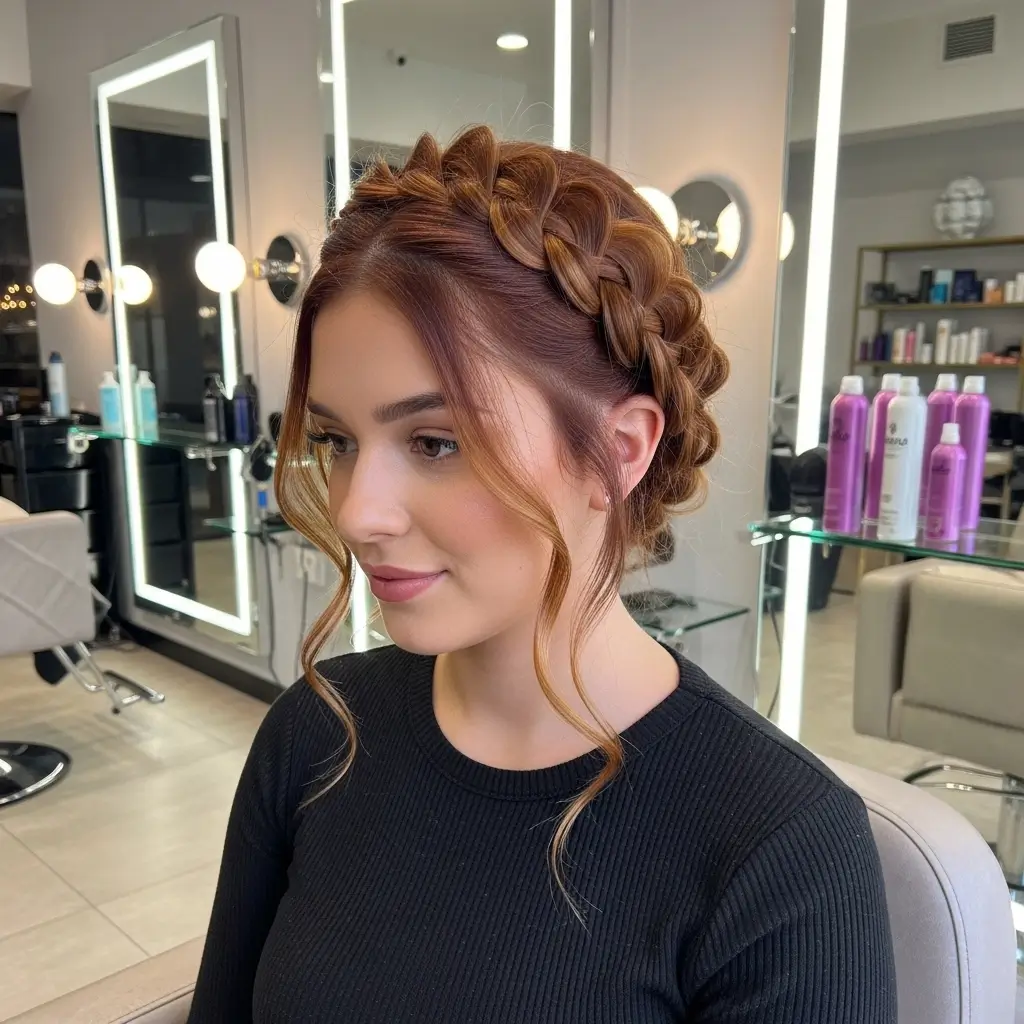
Ever wanted to look like a fairytale princess without the actual royal obligations? The Dutch crown braid delivers that ethereal, romantic vibe that makes everyone ask where you got your hair done. Plot twist: you did it yourself in your bathroom mirror.
This style works magic on medium to long hair, though I’ve successfully created mini versions on shoulder-length hair too.
The Dutch technique (braiding under instead of over) creates that gorgeous raised effect that sits like a crown on your head.
Creating Your Crown
Starting at one ear and working your way around takes practice. My first attempt looked more like a lopsided headband than a crown, but hey, we all start somewhere. The trick involves:
• Sectioning your hair horizontally across your head
• Beginning the Dutch braid at your preferred starting point
• Incorporating hair gradually as you work around
• Securing invisibly behind the opposite ear
Pro tip: Leave some face-framing pieces loose for that soft, romantic touch. Nobody wants to look like they’re wearing a swimming cap made of hair.
Sleek Bubble Ponytail Braid
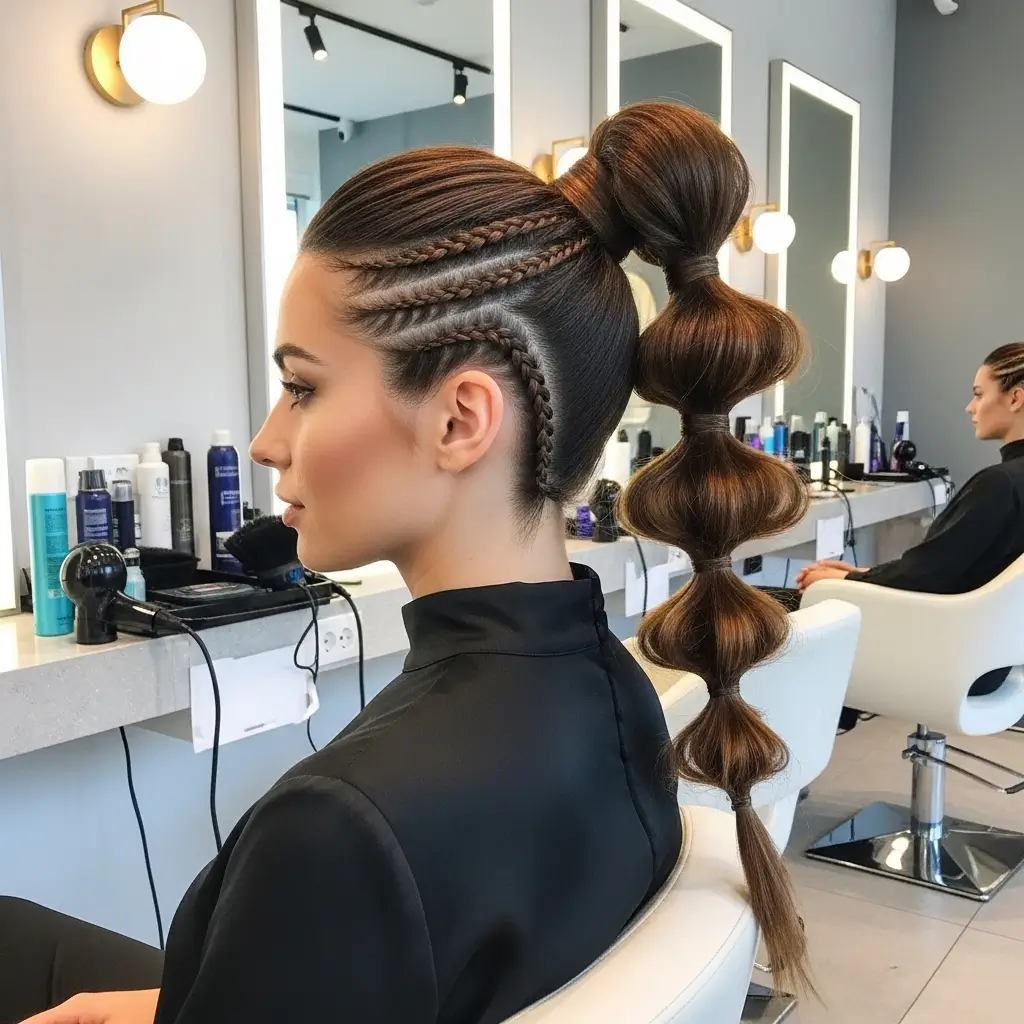
This style combines the sophistication of a sleek ponytail with the playfulness of bubble sections. I stumbled upon this look while trying to salvage a regular ponytail that kept sliding down – sometimes the best styles come from happy accidents!
The bubble ponytail braid requires precision and patience. You’re essentially creating multiple ponytails down the length of your hair, then puffing out each section. It sounds complicated, but once you get the rhythm, you’ll knock this out in under 10 minutes.
Achieving the Perfect Bubbles
Smooth, straight hair works best for this style. I always start with freshly washed and blow-dried hair, using a flat iron for extra sleekness. Here’s the breakdown:
• Create a high, tight ponytail
• Place clear elastics every 2-3 inches down the ponytail
• Gently tug each section to create the bubble effect
• Wrap a small piece of hair around each elastic to hide it
The result? A futuristic, editorial look that photographs beautifully from every angle. FYI, this style holds up remarkably well in humidity – a rare braided miracle!
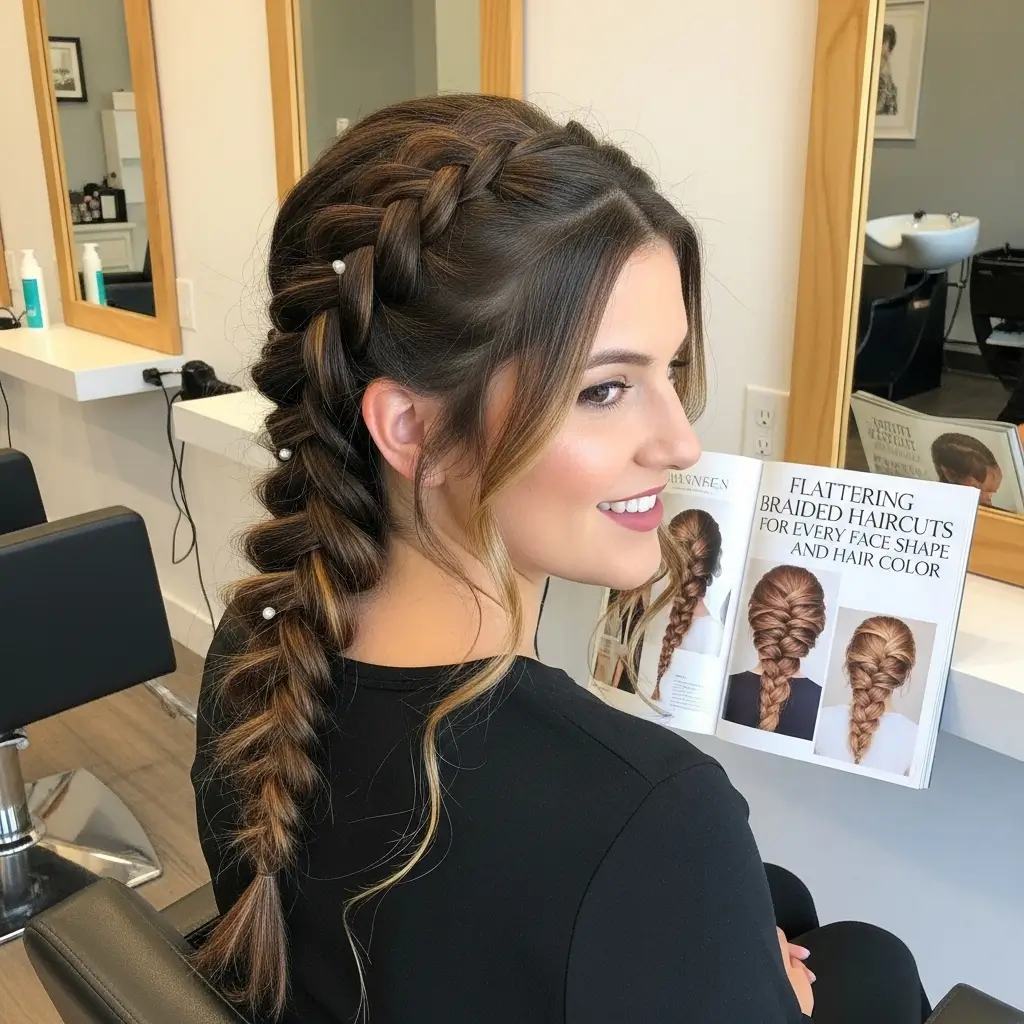
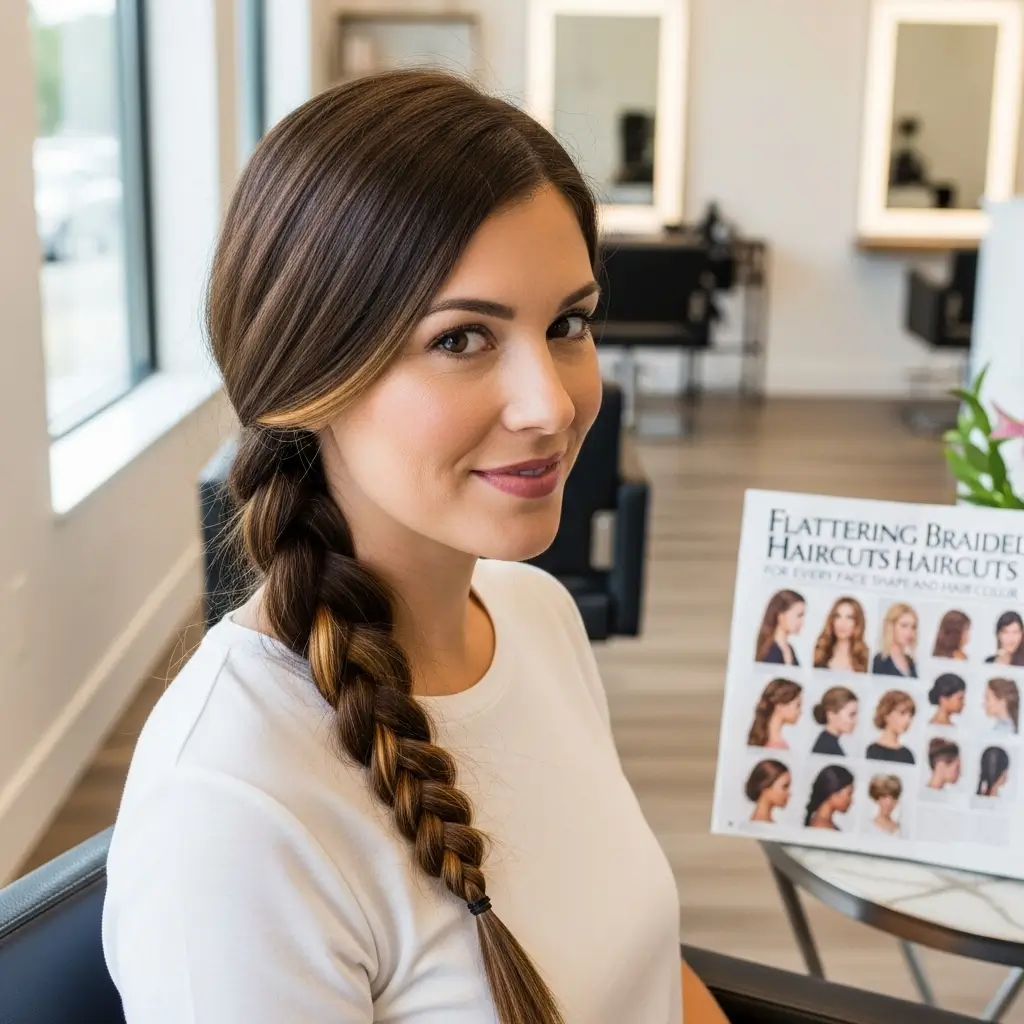
Messy Side Braid for Long Hair

Long hair can feel like both a blessing and a curse, right? The messy side braid embraces all that length while keeping things manageable and stylish. This has become my go-to style for lazy Sundays that unexpectedly turn into impromptu brunch dates.
Creating intentional messiness requires more technique than you’d think. You can’t just braid sloppily and call it a day – there’s an art to making chaos look chic.
The Art of Controlled Chaos
The perfect messy side braid balances structure with rebellion. Start by roughly blow-drying your hair with your fingers (no brush allowed). Then follow these steps:
• Sweep all hair to one side
• Begin a loose three-strand braid
• Randomly pull out small sections as you braid
• Tug at the braid to widen and loosen it
• Secure with a hair tie that matches your hair color
I like to pull out random pieces around my face and let them fall naturally. The goal? Looking like you just rolled out of bed looking fabulous – even if you spent 15 minutes perfecting that “mess.”
Classic French Braid with Ribbon
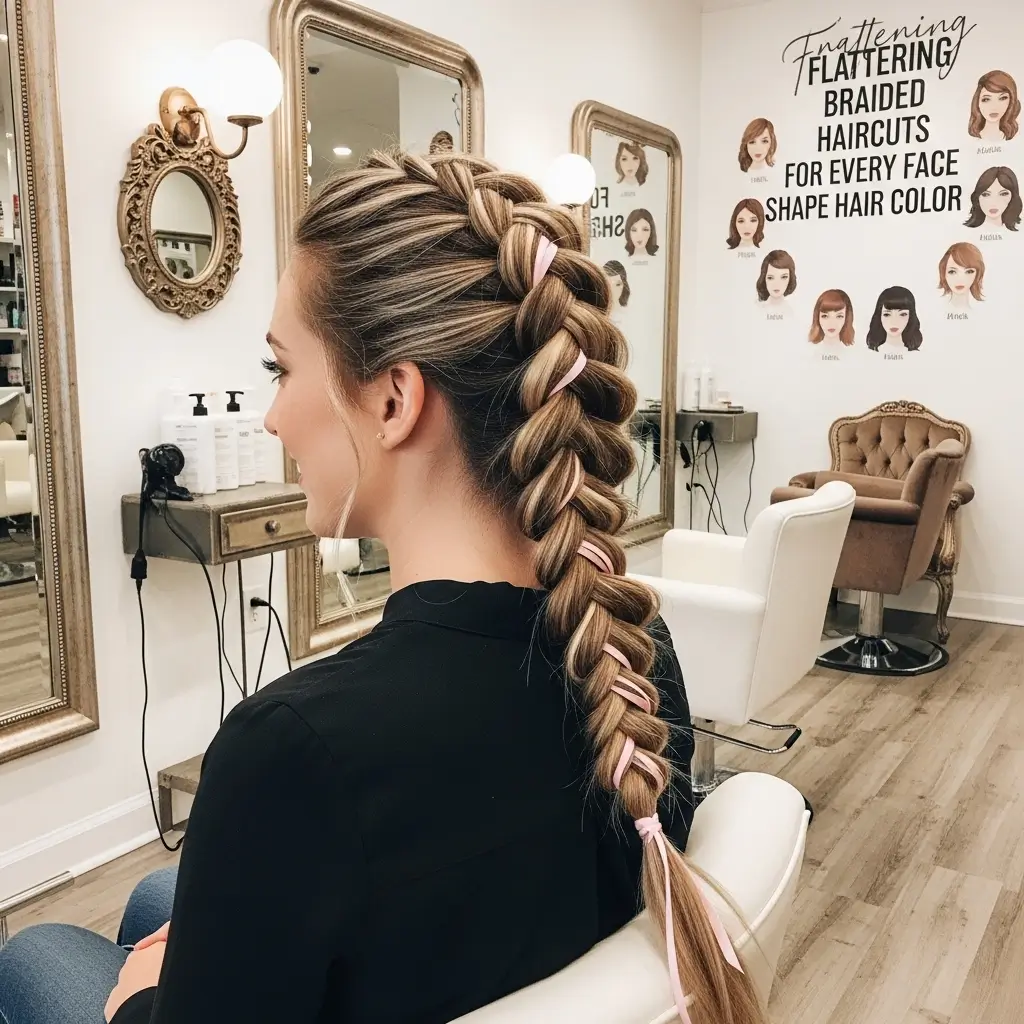
Adding ribbon to a French braid transforms a basic style into something special and personalized. I started doing this for my niece’s dance recitals, and now I incorporate ribbons into my own styles for special occasions.
The French braid itself remains timeless for good reason. It keeps hair secure, works on almost any hair length, and looks polished from morning to night. Adding ribbon just kicks it up several notches.
Ribbon Integration Techniques
Choosing the right ribbon makes all the difference. Satin ribbons slide through hair easily, while grosgrain ribbons provide better grip. Here’s my technique:
• Start your French braid as normal
• Incorporate the ribbon as a fourth strand
• Weave it through consistently for an even pattern
• Leave extra ribbon at the end for a bow
Color coordination opens endless possibilities. Match your ribbon to your outfit, use contrasting colors for pop, or go seasonal with holiday-themed ribbons. The versatility keeps this classic style fresh and modern.
Half-Up Waterfall Braid Look
The waterfall braid creates cascading strands that genuinely look like flowing water. I remember spending an entire Saturday mastering this technique, and now it’s my secret weapon for making straight hair look infinitely more interesting.
This style works beautifully on layered hair, as the varying lengths enhance the waterfall effect. Even better? It showcases highlights and color dimensions like nothing else.
Mastering the Waterfall Technique
The waterfall braid requires a different approach than traditional braiding. You’re literally dropping sections as you go, which feels wrong at first but creates magic. Follow these steps:
• Start with a regular three-strand braid at your temple
• Drop the bottom strand and pick up a new section from above
• Continue this pattern across your head
• Secure behind your ear with bobby pins
Want to level up? Create double or triple waterfall braids running parallel to each other. The layered effect looks incredibly intricate, though once you master the basic technique, multiples just require patience.
Chic Braided Low Bun
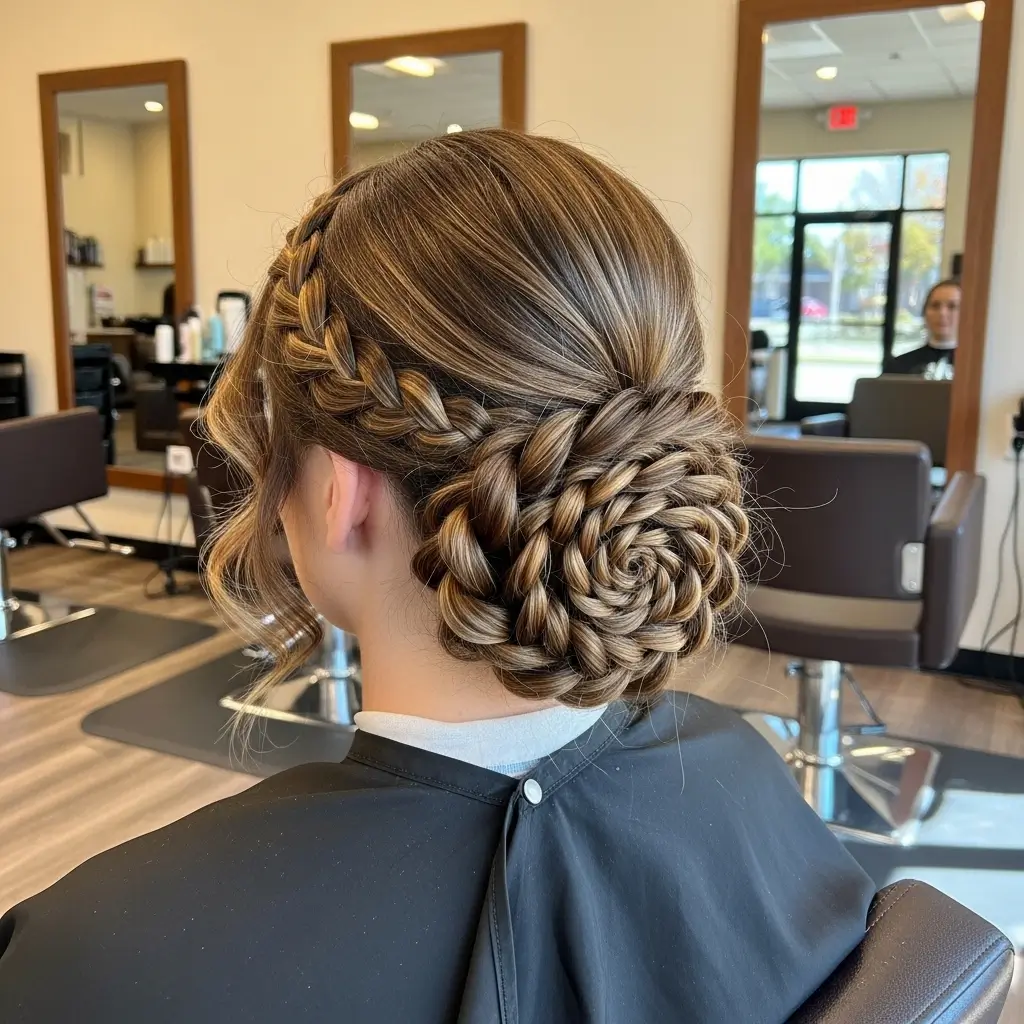
The braided low bun combines elegance with edge, making it perfect for everything from board meetings to wedding receptions. This style saved me during a particularly humid summer when my hair refused to cooperate with anything else.
Starting with a braid before creating the bun adds texture and visual interest that elevates the entire look. Plus, the braid helps everything stay in place without 47 bobby pins.
Building Your Braided Bun
Creating this sophisticated style requires strategic planning. You’re essentially building architecture with your hair. Here’s my approach:
• Create a loose braid starting at the crown
• Leave the braid slightly undone for texture
• Wrap the braid into a bun at the nape
• Pull out strategic pieces for softness
• Secure with bobby pins that match your hair
The finishing touch? A light mist of texturizing spray gives that perfectly imperfect finish that makes everyone think you woke up like this.
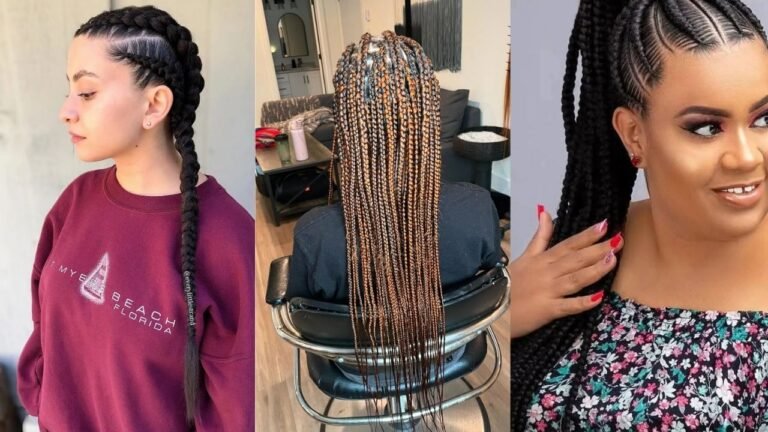
Double Boxer Braids
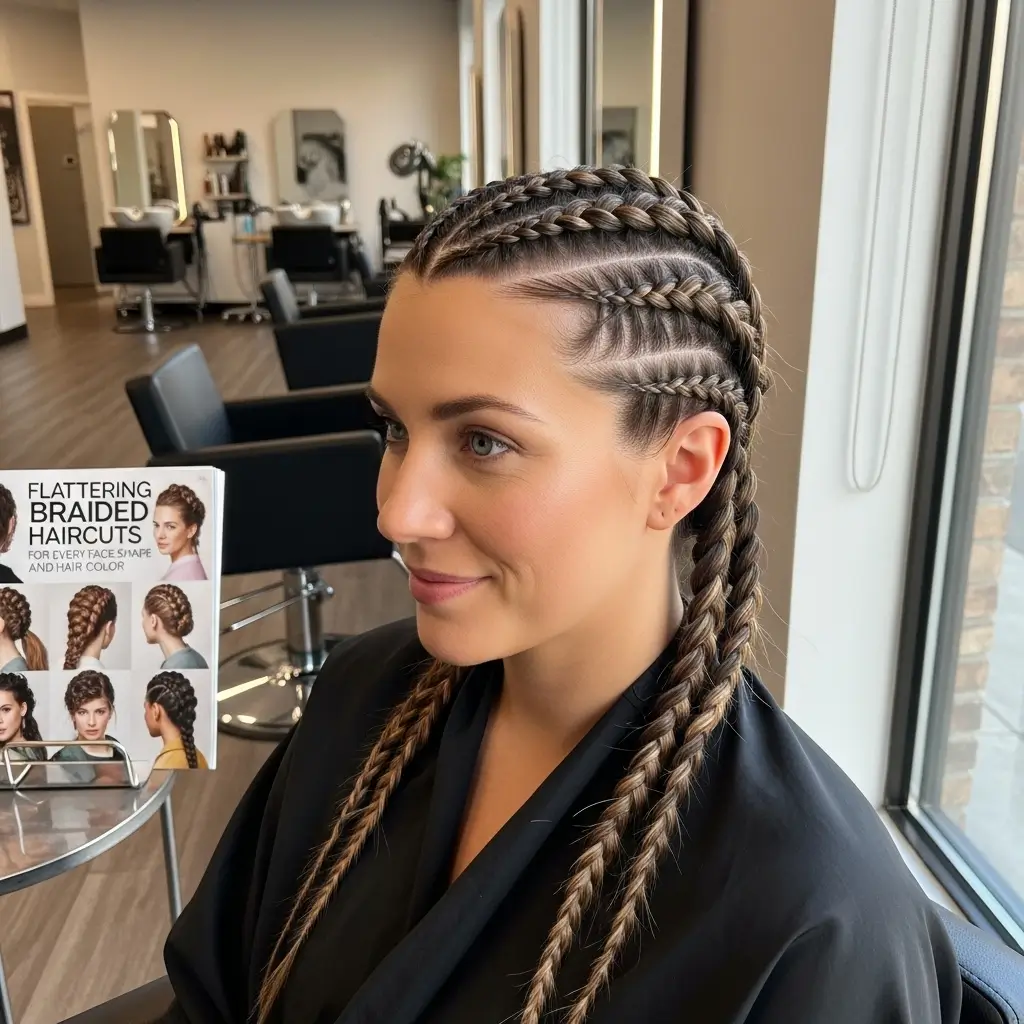
Boxer braids exploded onto the scene and refused to leave – and honestly, I’m not mad about it. These symmetrical Dutch braids offer both style and function, keeping hair completely controlled during workouts or long days.
I initially resisted this trend (too trendy for my taste), but after trying them for a hiking trip, I became a convert. They stayed perfect through eight hours of sweating and scrambling over rocks. Can your regular ponytail do that?
Perfecting Your Boxer Braids
Symmetry makes or breaks boxer braids. Even partings and consistent tension create that polished, athletic look. My method includes:
• Creating a perfect center part from forehead to nape
• Starting each braid at the hairline
• Maintaining consistent tension throughout
• Braiding all the way to the ends
• Securing with small, clear elastics
For extra edge, I sometimes incorporate colored extensions or metallic thread. The contrast against natural hair creates an unexpectedly cool effect that gets compliments every time.
Twisted Rope Braid Ponytail
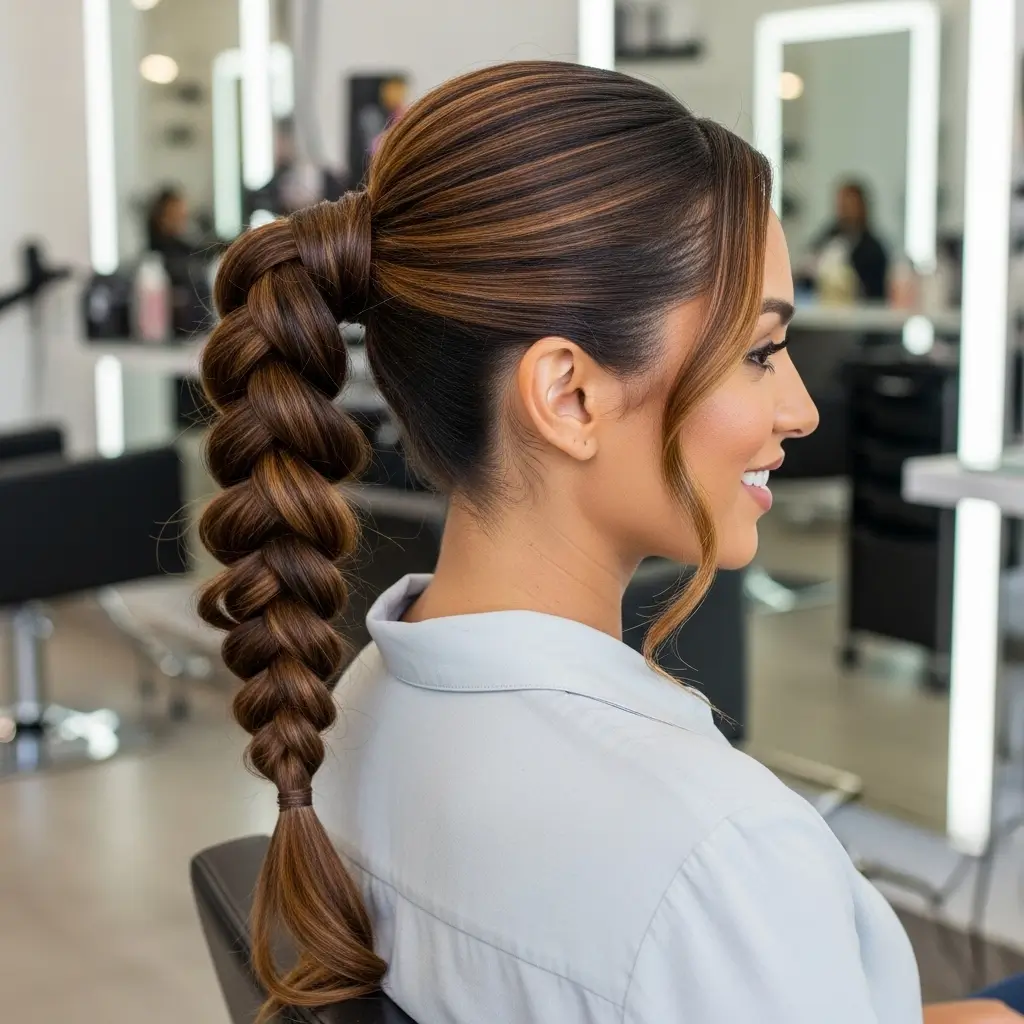
The rope braid ponytail offers a sophisticated alternative to traditional braiding. I discovered this style while desperately trying to disguise second-day hair before an important meeting. Turns out, twisting works better than braiding for certain hair textures.
This technique works especially well on fine or slippery hair that struggles to hold traditional braids. The twisting motion creates natural grip that keeps everything in place.
The Rope Braid Method
Creating a rope braid requires understanding the twist direction. You’re basically creating tension through opposition. Here’s the breakdown:
• Divide ponytail into two sections
• Twist each section clockwise individually
• Wrap them together counter-clockwise
• Continue to the ends
• Secure tightly
The result looks complex but takes literally three minutes once you understand the mechanics. IMO, this is the most underrated braid style out there
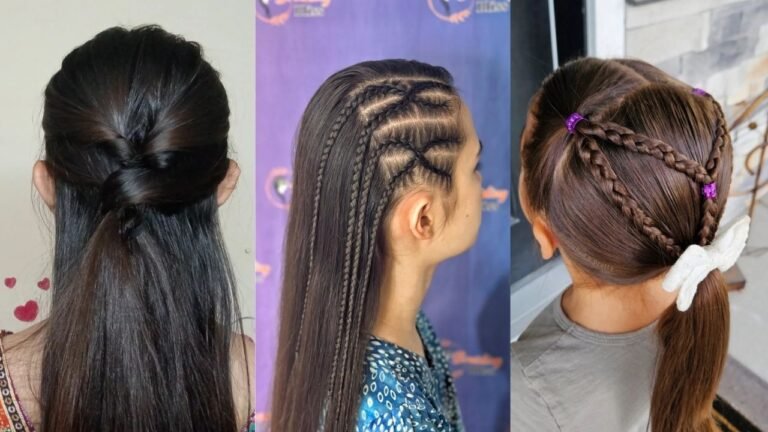
Braided Headband Hairstyle

Who needs actual headbands when you can create one from your own hair? The braided headband keeps hair off your face while adding bohemian charm to any look. This became my summer staple when regular headbands kept sliding off my apparently oddly-shaped head.
This style works on virtually any hair length past chin-level. You’re only braiding a small section, so even bob-length hair can rock this look.
Creating Your Hair Headband
The placement determines everything with this style. Too high looks costume-y, too low defeats the purpose. Finding your sweet spot takes experimentation:
• Start the braid behind one ear
• Braid across the top of your head
• Keep the braid tight against your scalp
• Secure behind the opposite ear
• Hide the end under loose hair
For extra hold on fine hair, I lightly backcomb the section before braiding. The added texture helps everything grip better without visible teasing.
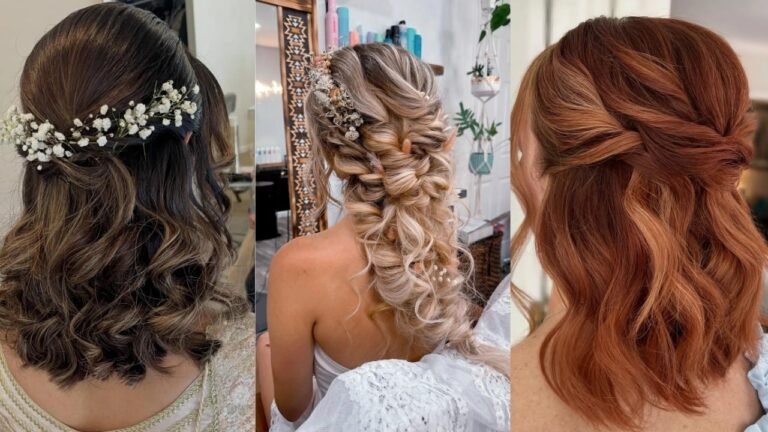
Elegant Bridal Braid Updo
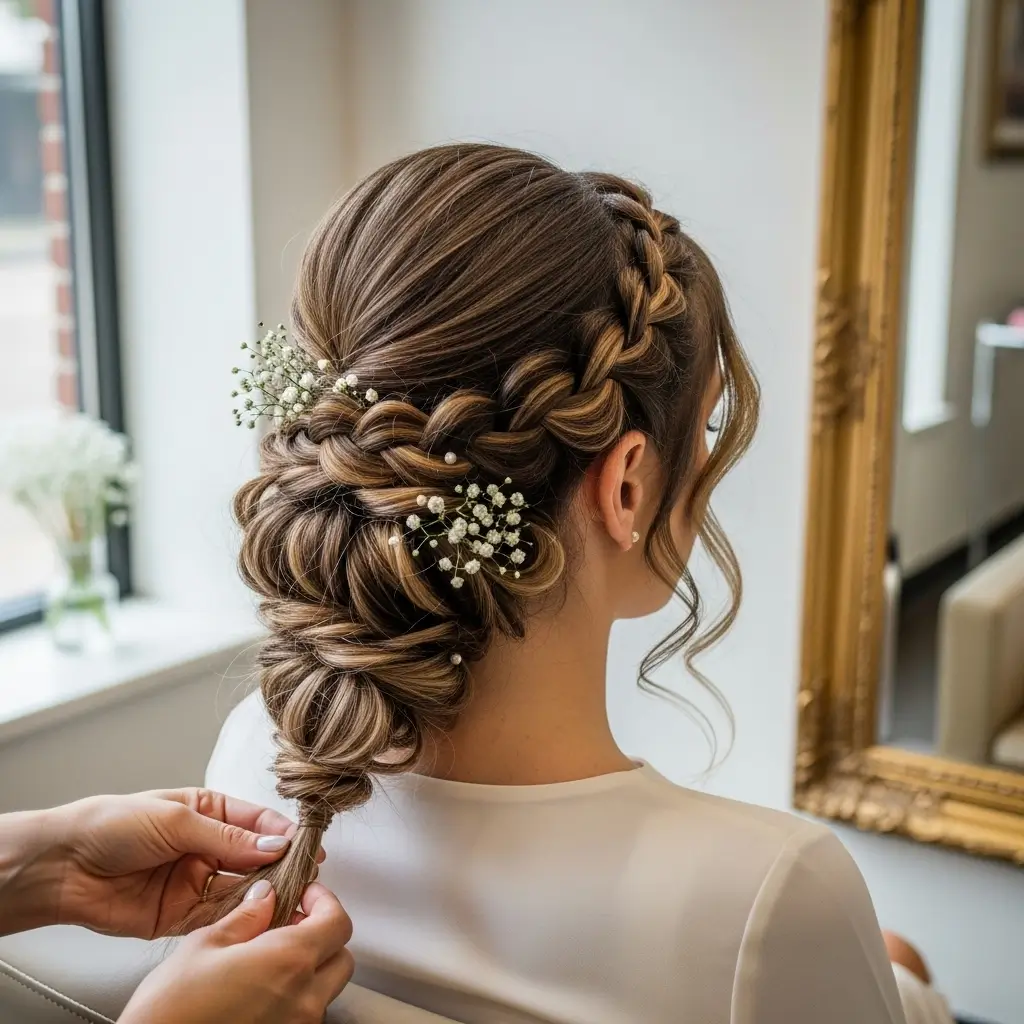
Bridal braids require a delicate balance of romance and durability. Nobody wants their hair falling apart during their first dance, trust me. I’ve done enough wedding hair (including my own) to know what works and what doesn’t.
The key lies in preparation and products. Start with clean, properly prepped hair and don’t skimp on the holding products. Your future self will thank you when those photos still look perfect at 2 AM.
Building a Bridal Masterpiece
Creating bridal-worthy braids involves layering techniques for maximum impact:
• Start with a texturizing base
• Create multiple braided elements
• Combine different braid types for dimension
• Pin strategically for security
• Finish with a setting spray
Consider incorporating pearls, flowers, or delicate pins throughout the braids. These details photograph beautifully and add that special bridal touch without overwhelming the style.
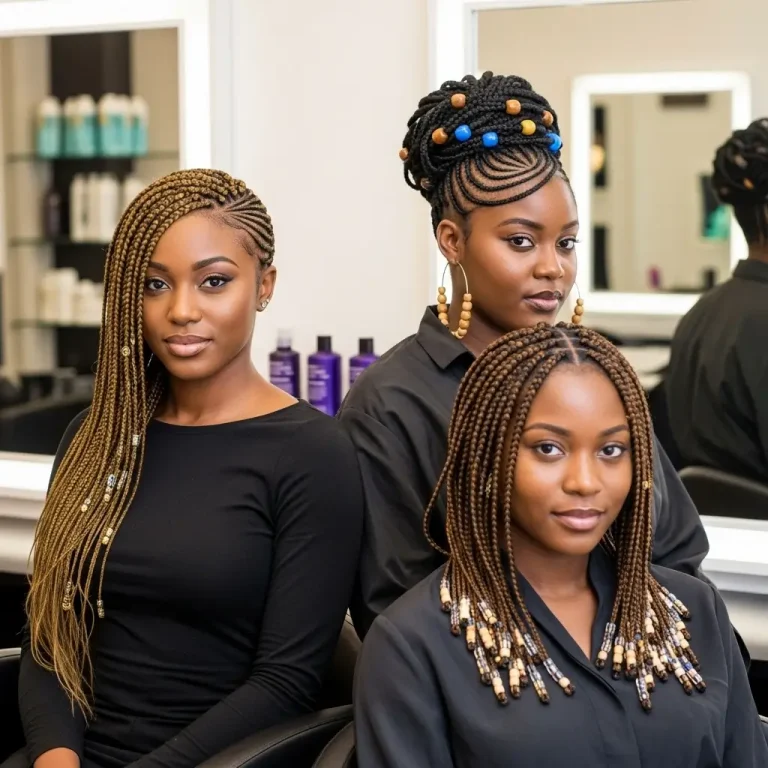
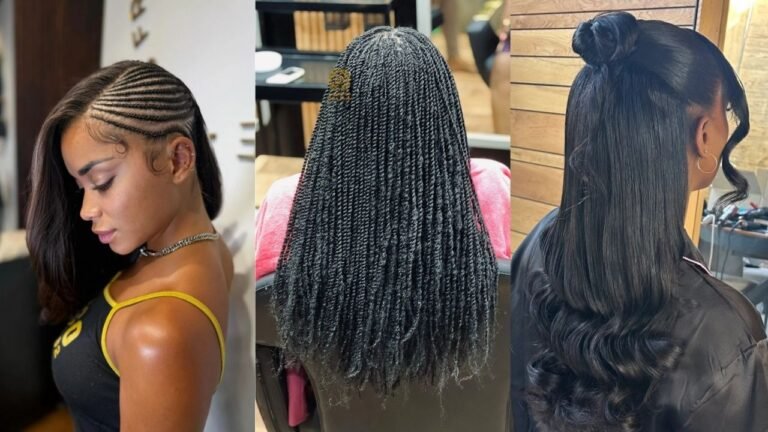
Afro-Inspired Cornrow Braids
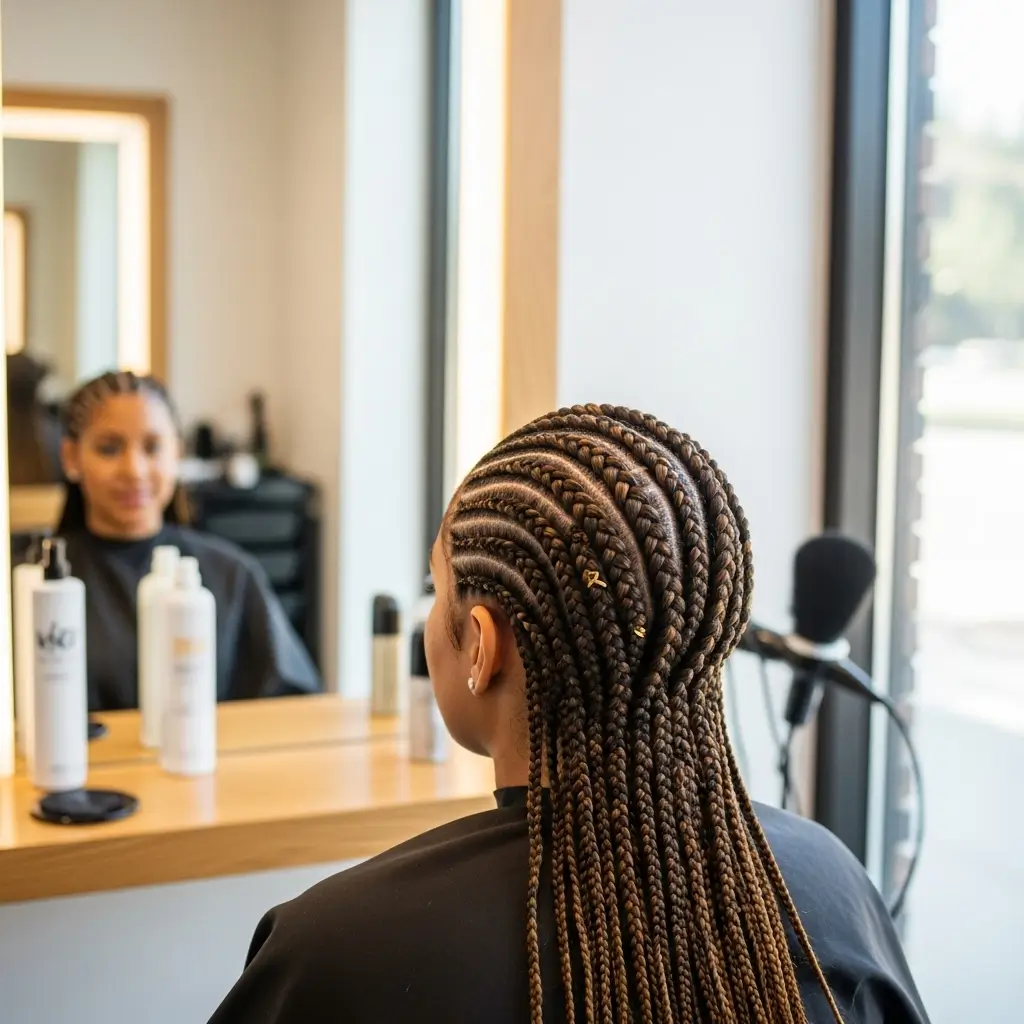
Cornrows represent cultural artistry and practical genius combined. These tight, scalp-hugging braids create infinite pattern possibilities while protecting natural hair texture.
Learning proper cornrow technique requires patience and practice. The tension and angle must remain consistent for clean lines and long-lasting results.
Understanding Cornrow Basics
Creating cornrows differs fundamentally from other braiding techniques:
• Work with properly moisturized hair
• Section precisely for clean parts
• Braid tightly against the scalp
• Maintain consistent size throughout
• Seal ends properly
The patterns you create become wearable art. Straight lines, curves, zigzags – your scalp becomes a canvas for creative expression.
Festival Braided Space Buns
Space buns scream fun, and adding braids takes them from cute to absolutely iconic. These playful double buns work perfectly for concerts, festivals, or whenever you need maximum personality in your hairstyle.
I wore braided space buns to Coachella (yes, basic, I know), and they survived three days of dancing, dust, and questionable sleeping arrangements. The braids add structure that keeps everything intact no matter how hard you party.
Space Bun Construction
Building sturdy space buns requires strategic braiding placement:
• Part hair down the center
• Create high pigtails on each side
• Braid each pigtail (Dutch braids work great)
• Wrap braids into buns
• Secure with bobby pins and elastic
• Pull out wispy pieces for softness
Add glitter roots, temporary color, or hair gems for full festival effect. The more extra, the better – this style doesn’t do subtle.
Simple Everyday Three-Strand Braid
Sometimes simple wins. The basic three-strand braid remains a classic for good reason – it works on everyone, takes seconds to create, and solves countless bad hair days.
Don’t underestimate this fundamental technique. Mastering the basics opens doors to every advanced style. Plus, a perfectly executed simple braid often looks more polished than complicated attempts at trendy styles.
Elevating the Basic Braid
Making a simple braid special involves small refinements:
• Start with smoothed, prepped hair
• Maintain even tension throughout
• Keep sections equal in size
• Finish with a polished elastic
• Add subtle accessories if desired
Try braiding damp hair before bed for perfect waves the next morning. This overnight technique gives you two styles for the effort of one.
Voluminous Pull-Through Braid
The pull-through braid creates massive volume without teasing or damage. This optical illusion makes thin hair look thick and thick hair look absolutely magnificent. I learned this technique from a hairstylist friend who swore it would change my life – she wasn’t wrong.
This isn’t technically a braid, but who’s keeping track? You’re creating the visual effect of an incredibly full braid using ponytail sections.
Pull-Through Technique
The pull-through method requires patience and precision:
• Create a small ponytail at the crown
• Make another ponytail directly below
• Split the first ponytail and wrap around the second
• Continue this pattern down your head
• Gently tug each section for volume
The result looks impossibly intricate, like something requiring professional skills. Nobody needs to know you learned it from a YouTube tutorial in your pajamas.
Final Thoughts
Braiding transforms hair from simple strands into wearable art. These 15 styles offer something for every skill level, hair type, and occasion.
Start with the basics and work your way up to the showstoppers – or jump straight into the deep end if you’re feeling brave.
Remember, perfect braids don’t exist outside of Instagram. Embrace the imperfections, enjoy the process, and don’t take it too seriously. Hair grows back, bobby pins are cheap, and every failed attempt teaches you something useful.
Now stop reading and start braiding! Your hair’s been waiting for this glow-up, and these styles won’t create themselves. Which one will you try first? :/