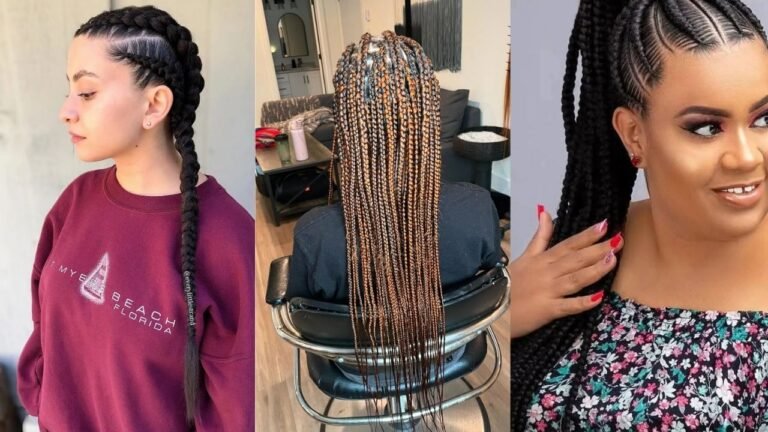
15 Cute Braided Hairstyle Ideas for Effortless Beauty
Listen, we need to talk about braids. Not the boring, same-old French braid your mom did for picture day – I’m talking about the game-changing, head-turning styles that’ll have everyone asking “How did you DO that?” Trust me, I’ve spent way too many hours on YouTube trying to master these looks, and now I’m passing all that hard-earned wisdom to you.
You know that feeling when you scroll through Instagram and see someone with the perfect braided hairstyle? Yeah, that used to make me want to throw my phone across the room.
But here’s the thing – those styles aren’t as impossible as they look. I promise you, with the right techniques and maybe a few practice runs (okay, maybe more than a few), you’ll nail these looks.
So grab your hair ties, maybe a coffee, and let’s get into these 15 braided hairstyles that’ll transform your hair game completely.
Fair warning: you might become the designated hair person in your friend group after mastering these.
Bubble Braid Ponytail
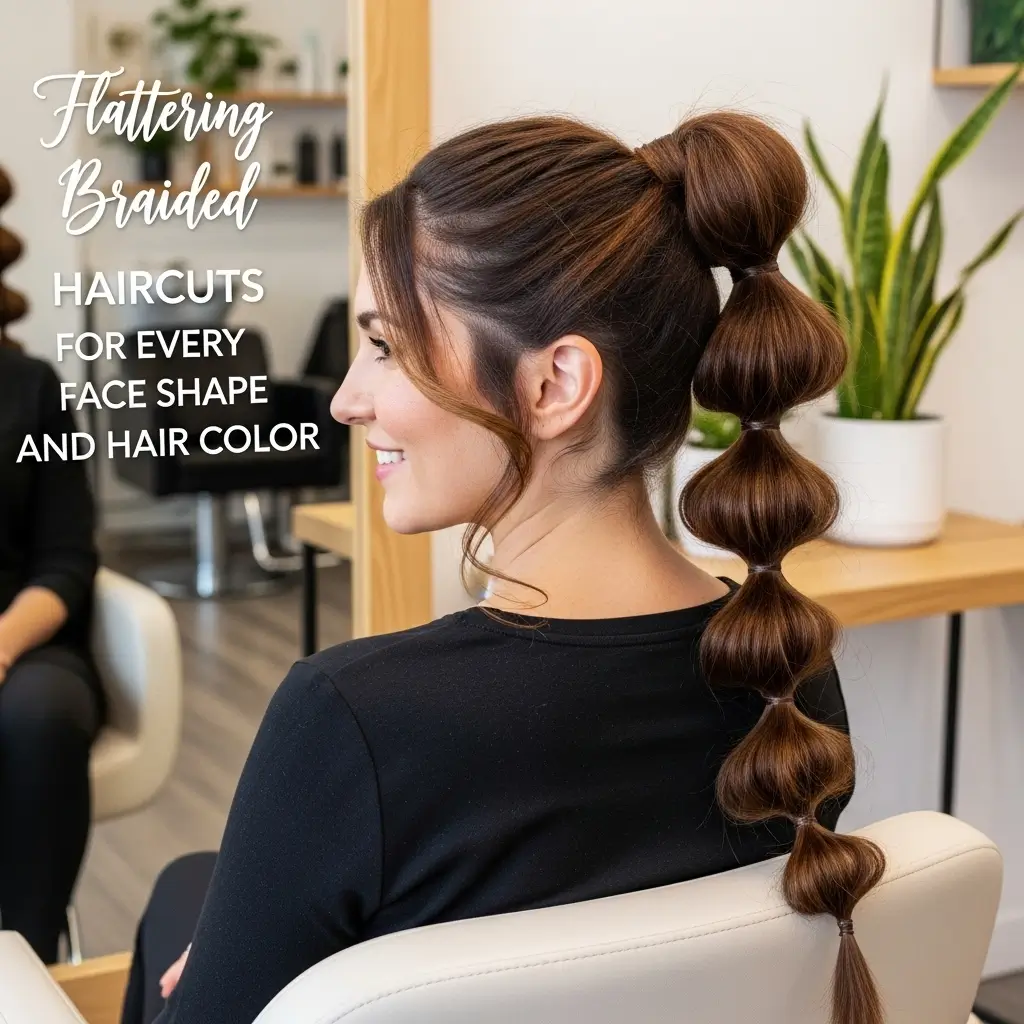
Okay, starting with my absolute favorite lazy-girl hack – the bubble braid ponytail. This style literally takes five minutes once you get the hang of it, and people think you spent an hour on your hair.
The best part? It works on literally any hair texture, and you don’t need to know how to actually braid anything.
Here’s what makes this style genius: you’re basically creating the illusion of a complex braid without doing any actual braiding.
Start with a high ponytail – and I mean really secure that thing because nobody wants a droopy bubble braid halfway through the day. Then, add hair ties every 2-3 inches down your ponytail.
Now comes the fun part. Gently pull and tug each section between the ties to create those signature “bubbles.” Don’t be shy here – the messier and fuller these bubbles, the better the final look.
I learned this the hard way after my first attempt looked more like a sad string of sausages than a cute hairstyle.
Pro tips for the perfect bubble braid:
- Use clear elastic bands for a seamless look
- Wrap a small piece of hair around your base tie to hide it
- Add texture spray before starting for better grip
- Pull the bubbles wider at the top and gradually smaller toward the bottom
- Finish with hairspray to lock everything in place
Half-Up Heart Braid
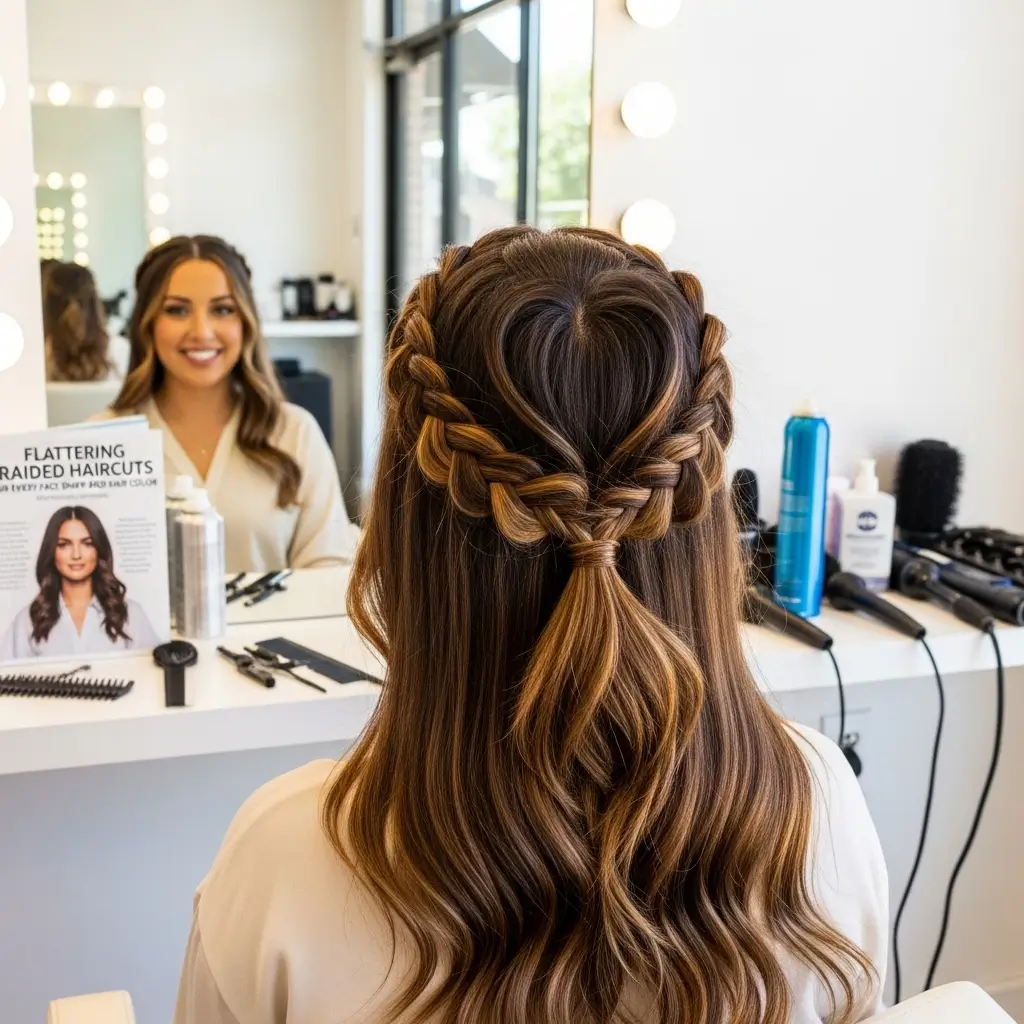
Ready for something that’ll make everyone go “aww”? The half-up heart braid is basically the hairstyle equivalent of putting a heart emoji on everything, except it actually looks sophisticated. This style had me frustrated for weeks until I finally cracked the code.
The trick here is starting with the right sectioning. Take two sections from either side of your head, roughly at temple level.
These need to be even – and I mean really even – or your heart will look more like a wonky kidney bean. Trust me on this one.
Begin braiding each section backward, creating a slight curve as you go. The magic happens when you bring these braids together at the back of your head, forming the bottom point of your heart.
Secure them together and let the rest of your hair flow free. It’s romantic without trying too hard, you know?
What really sells this look is the gentle loosening of the braids once they’re secured. Don’t pull too hard – you want definition, not destruction.
I’ve definitely had moments where I got too enthusiastic and turned my heart into an abstract blob.
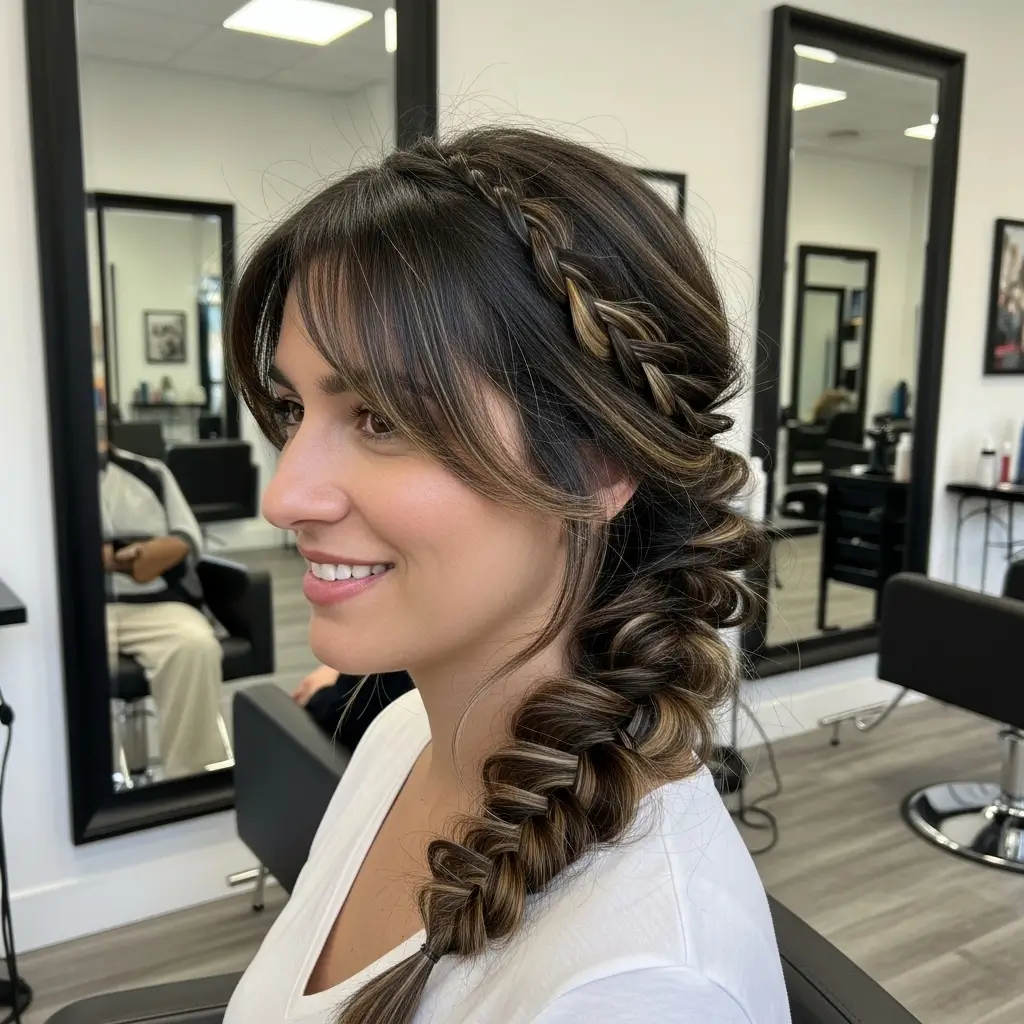
Messy Side Fishtail
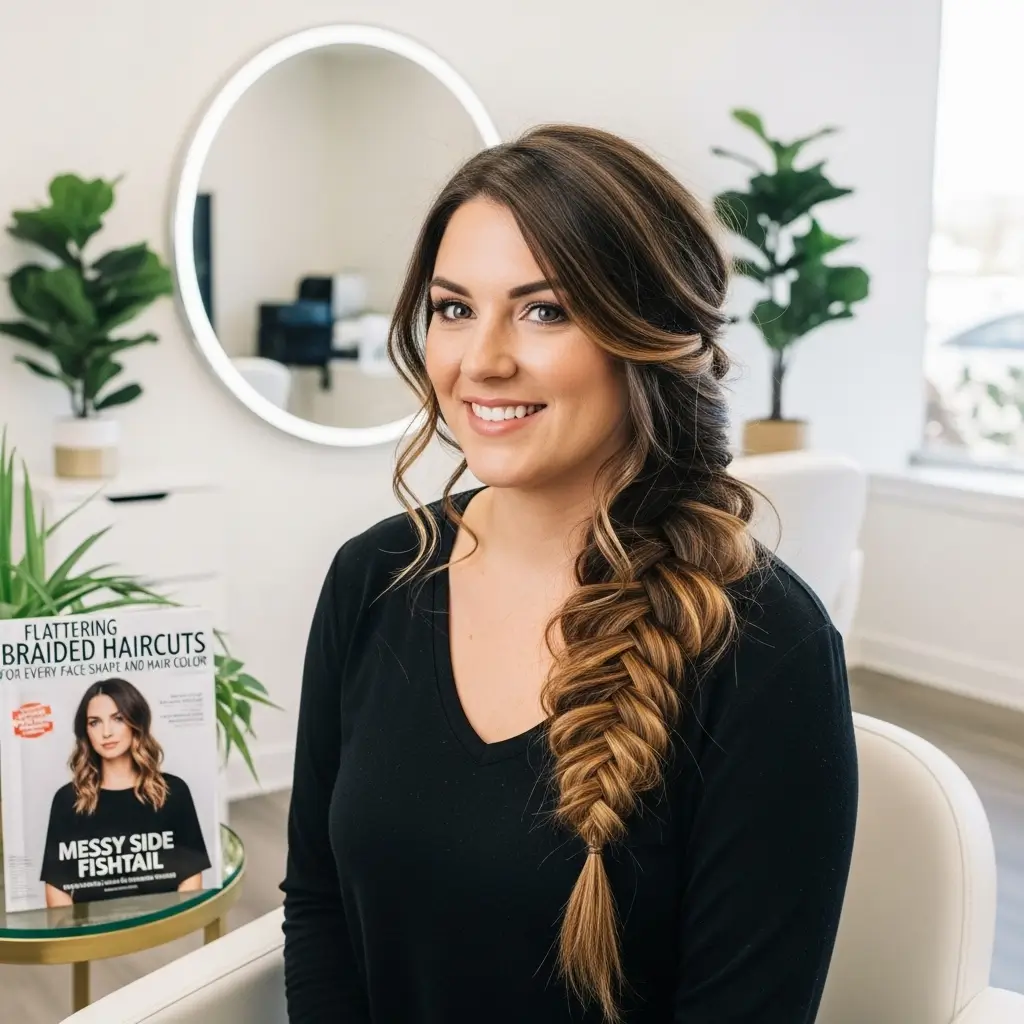
Can we talk about how the messy side fishtail is having such a moment right now? This style screams “I woke up like this” even though we all know it takes some serious technique.
But here’s the secret – the messier it gets, the better it looks. Finally, a hairstyle that rewards my lack of perfectionism!
Start by sweeping all your hair to one side. And I mean all of it – commit to that side sweep like your life depends on it.
The fishtail technique itself is surprisingly simple once you get it: divide your hair into two sections, then take tiny pieces from the outside of each section and cross them over to the opposite side.
Here’s where people mess up: they make the sections too big. Keep those pieces small and consistent for that intricate fishtail pattern. But – and this is crucial – don’t make it too perfect. The whole point is that effortlessly undone vibe.
The messy factor comes from:
- Gently tugging at the braid to loosen it
- Leaving some face-framing pieces out
- Starting the braid lower for a more relaxed look
- Using texturizing spray beforehand
- Letting natural flyaways do their thing
Dutch Crown Braid
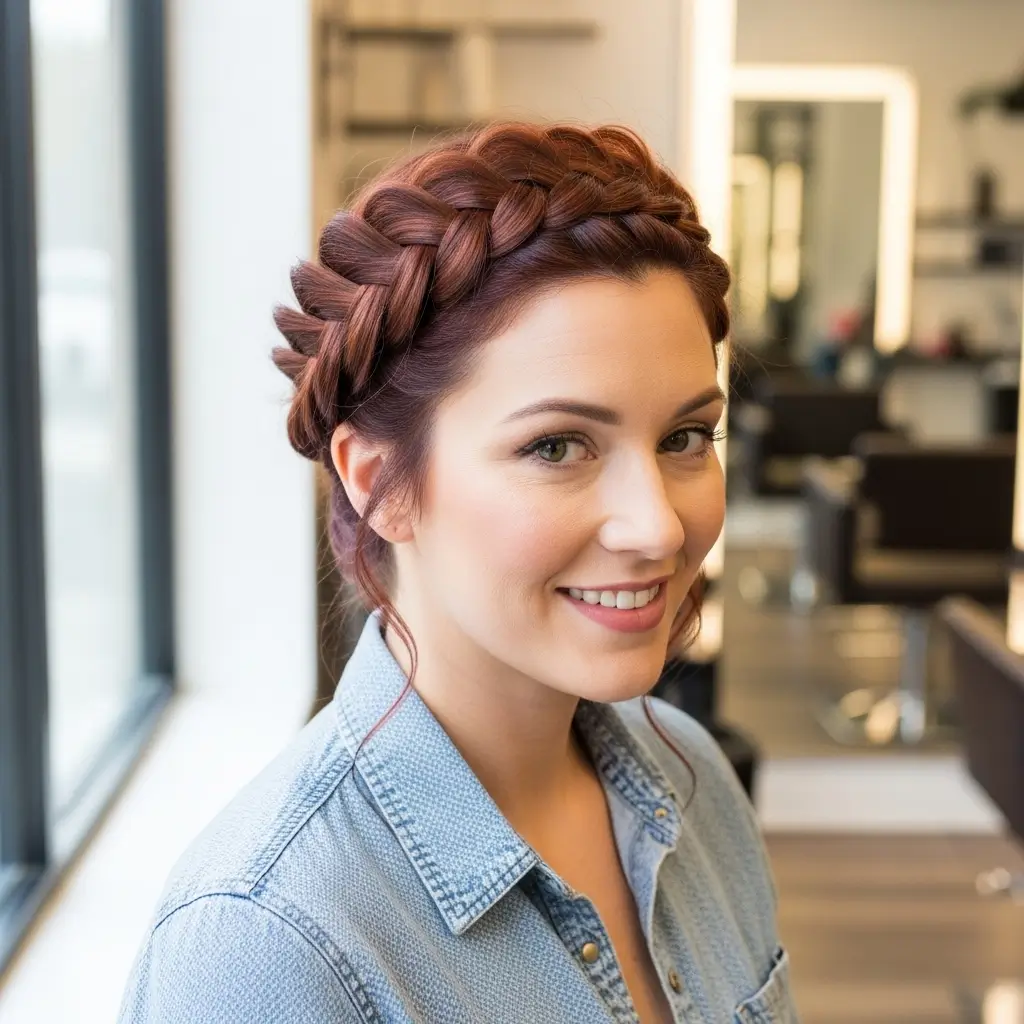
The Dutch crown braid makes you look like you just stepped out of a fairy tale, and honestly, who doesn’t want that energy?
This style used to intimidate the heck out of me until I realized it’s just an inverted French braid that goes around your head. Revolutionary, right?
Starting at one ear, begin your Dutch braid by crossing sections under instead of over. This creates that gorgeous raised effect that makes the braid pop off your head. Keep the braid close to your hairline as you work your way around – think of it as creating a halo.
The trickiest part? Maintaining consistent tension as you navigate around your head. Your arms will get tired (mine definitely do), but push through.
The first time I tried this, one side was tight and neat while the other looked like I braided it during an earthquake. Practice makes perfect, though.
What really elevates this style is what you do with the ends. You can tuck them under the braid for a complete crown, leave them hanging for a bohemian vibe, or wrap them into a bun. Each option gives you a completely different look with the same base technique.
Mini Accent Braids
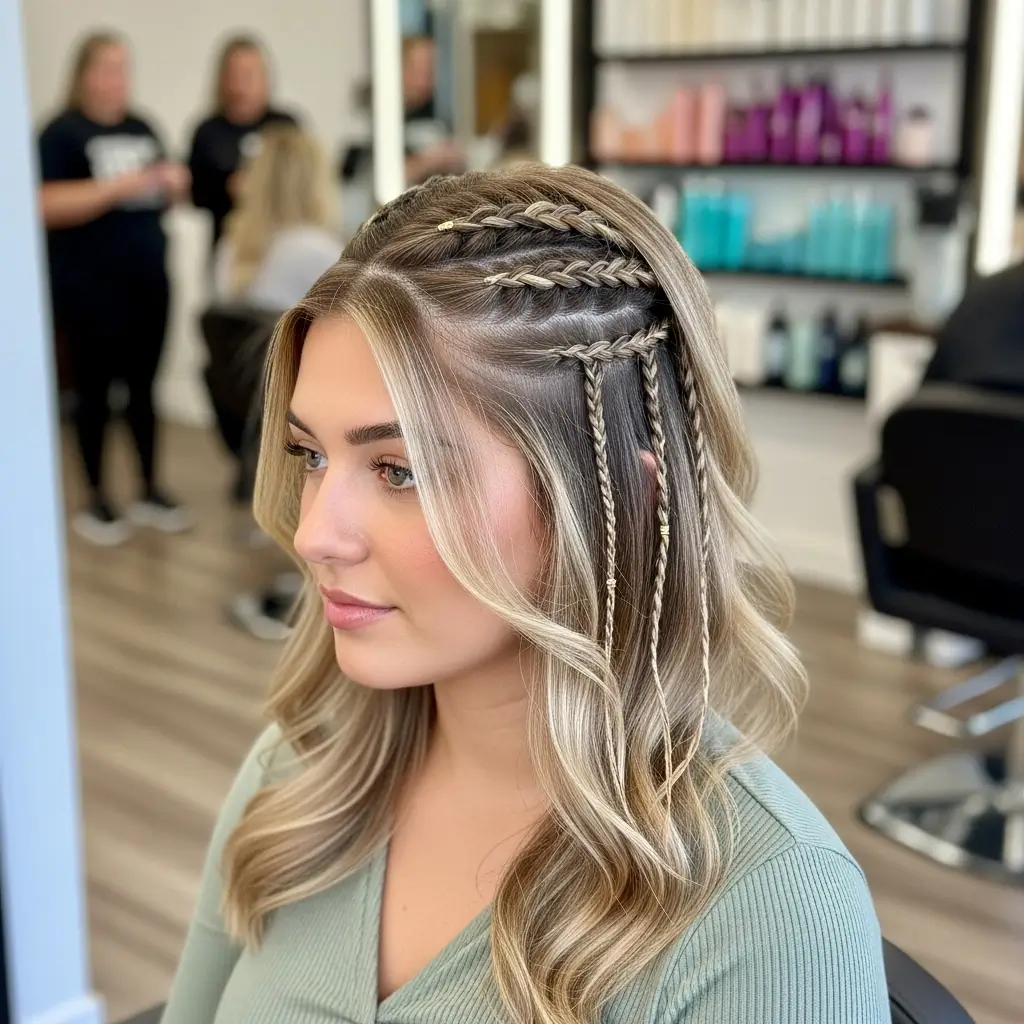
Let’s get real – sometimes you want braids but don’t want to commit to a whole situation. Enter mini accent braids, the perfect solution for us commitment-phobes. These tiny braids pack a surprising punch and take literally two minutes to create.
Pick a small section of hair – maybe at your part, behind your ear, or scattered throughout. Braid these sections tightly (this is the one time tight is right) and secure with tiny clear elastics. The beauty is in the randomness, so don’t overthink placement.
I love throwing in 2-3 mini braids when my hair is otherwise straight or wavy. It adds just enough interest without screaming “look at my elaborate hairstyle!” Plus, they last for days if you secure them well, making them perfect for festivals or vacations.
Ways to style mini accent braids:
- Add metallic thread or ribbon for extra flair
- Incorporate them into a ponytail or bun
- Use them to pin back face-framing layers
- Create a subtle pattern with multiple braids
- Leave them in while you sleep for next-day texture
Boho Double Braids
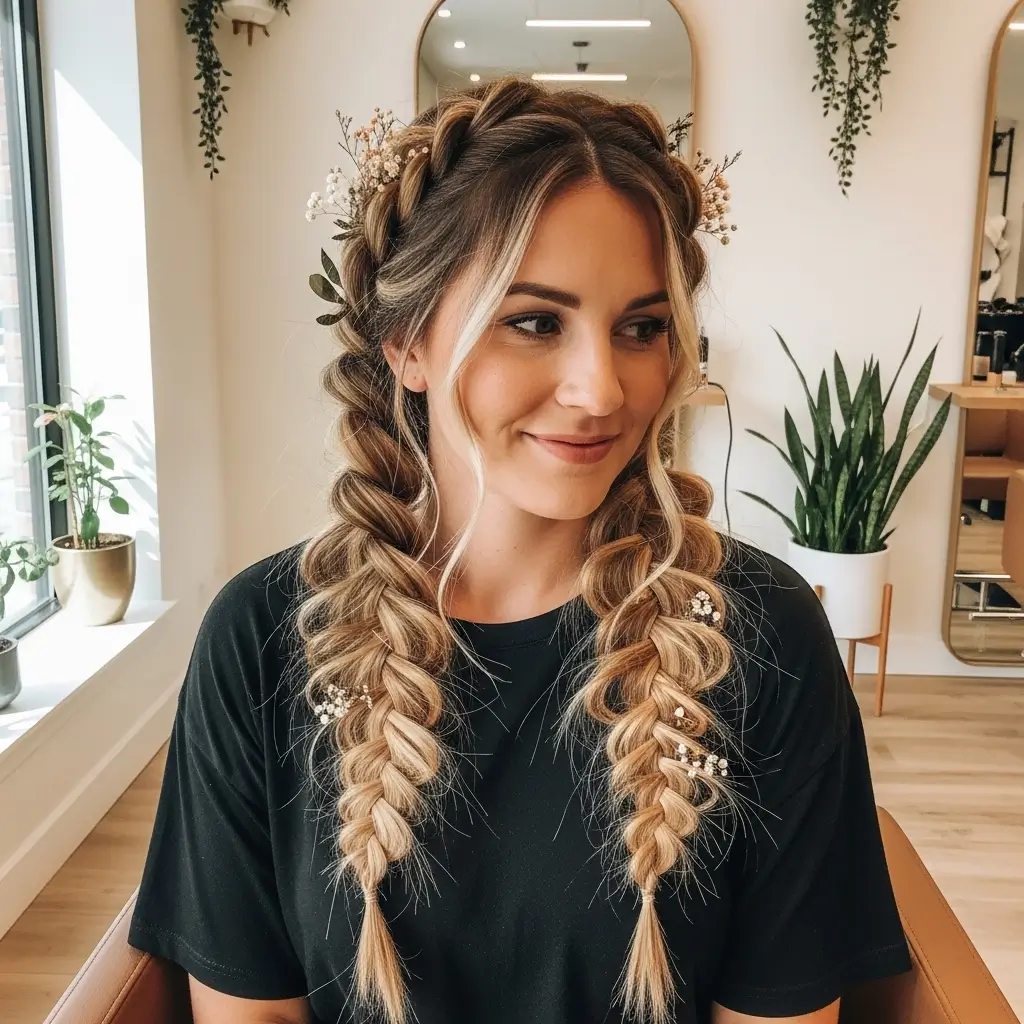
Nothing says “free spirit with great hair” quite like boho double braids. This style has been my go-to for every music festival, beach day, and casual Sunday when I still want to look put-together. The key is embracing the imperfection – perfection is so not boho, FYI.
Start by creating a messy center part – and yes, messy is the goal here. Separate your hair into two sections and begin braiding each side.
The braids can be regular three-strand, fishtail, or even a mix. That’s the beauty of boho style; there are no rules.
Pull, tug, and mess up those braids until they look like you’ve been wearing them all day. Add some face-framing pieces, maybe tuck in some small flowers or ribbons if you’re feeling extra.
The whole vibe should say “I braided this while sitting in a meadow,” even if you actually did it in your bathroom.
What makes this style special is the intentional imperfection. Every bump, loose piece, and uneven section adds to the charm.
The first time I tried to make these “perfectly messy,” I spent an hour overthinking it. Now I just braid, pull, and go.
Waterfall Twist Braid
The waterfall twist braid looks like pure magic, and watching people try to figure out how it works never gets old.
This style creates the illusion of hair cascading through a braid, like a literal waterfall. Poetic, right? It’s actually easier than it looks once you understand the rhythm.
Begin with a small section at your temple and divide it into three pieces. Start a regular braid, but here’s the twist (pun intended): every time you cross the top section over, drop it completely and pick up a new section from behind it. This creates that gorgeous waterfall effect.
The key to nailing this look is maintaining consistent section sizes. If your dropped pieces are different sizes, the waterfall looks more like a leaky faucet.
Keep them uniform, and you’ll get that stunning cascading effect that makes everyone think you’re a hair wizard.
Mastering the waterfall technique:
- Work with a mirror until you get the muscle memory
- Keep the braid horizontal for the best effect
- Use a comb to smooth each new section before adding it
- Pin the end securely behind your ear
- Curl the dropped sections for extra drama
Low Braided Bun
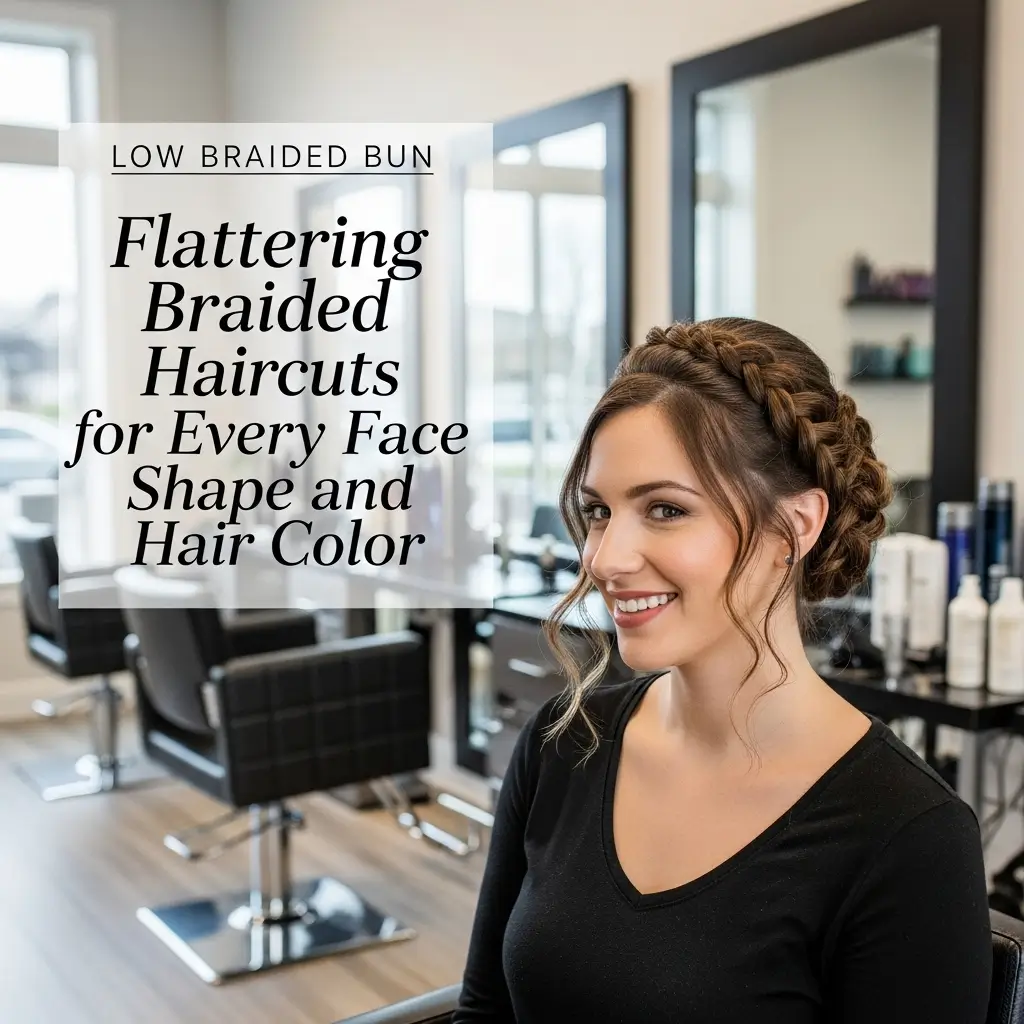
When you need to look polished but also want to show off your braiding skills, the low braided bun is your answer.
This style says “I have my life together” while also saying “and I have great hair.” It’s professional enough for work but interesting enough for date night.
Start with a low ponytail at the nape of your neck. Braid the ponytail – any type of braid works here, though I’m partial to a fishtail for extra texture. Once you’ve braided to the end, the transformation begins.
Wrap the braid around the base of your ponytail, creating a bun shape. But don’t wrap it too tightly! You want some dimension and texture.
Secure with bobby pins strategically placed to maintain the shape while keeping that effortless look.
The secret that took me forever to figure out? Pull the braid apart before wrapping it. This creates volume and makes even thin hair look luxuriously thick. My first attempts looked like a sad cinnamon roll until I learned this trick.
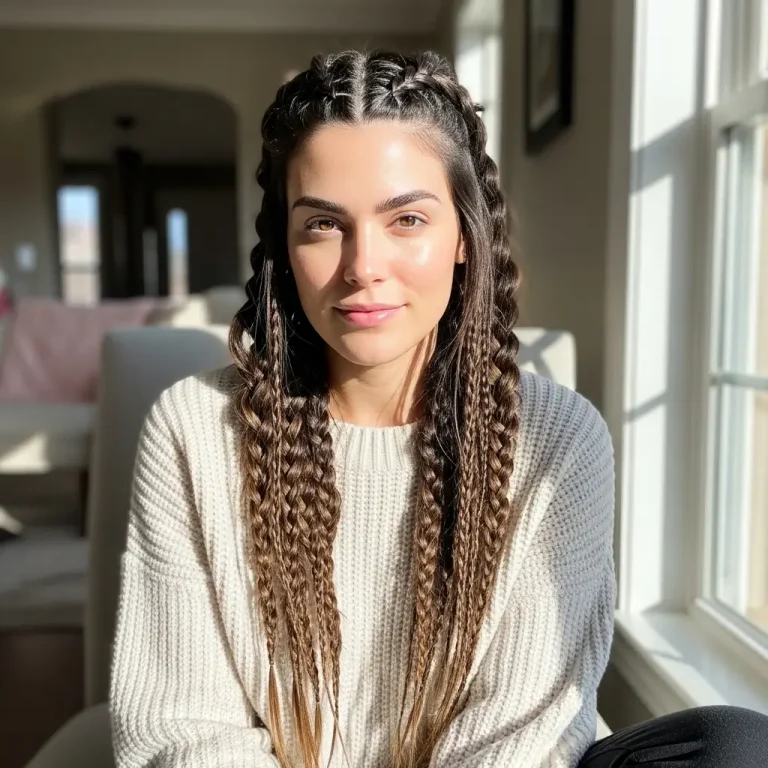
Infinity Braid Pigtails
Okay, the infinity braid pigtails might be the most extra style on this list, but sometimes you need to go big or go home.
These braids literally look like the infinity symbol running through your pigtails, and yes, people will stop you to ask how you did it 🙂
This technique requires dividing each pigtail into three sections, but you’ll only actively braid with two of them.
The third acts as a stationary post that you wrap the other sections around in a figure-eight pattern. Sounds complicated? It kind of is, but the result is so worth it.
The first time I attempted these, I watched the same tutorial approximately 47 times. The movement pattern is what trips people up – you’re essentially creating loops around that center section. Once your hands memorize the pattern, though, you can do it without thinking.
Tips for perfect infinity braids:
- Start with slightly damp hair for better control
- Keep sections very even for a uniform pattern
- Don’t pull too tight or you’ll lose the infinity shape
- Practice the hand movements without hair first
- Secure ends extra well – these can unravel easily
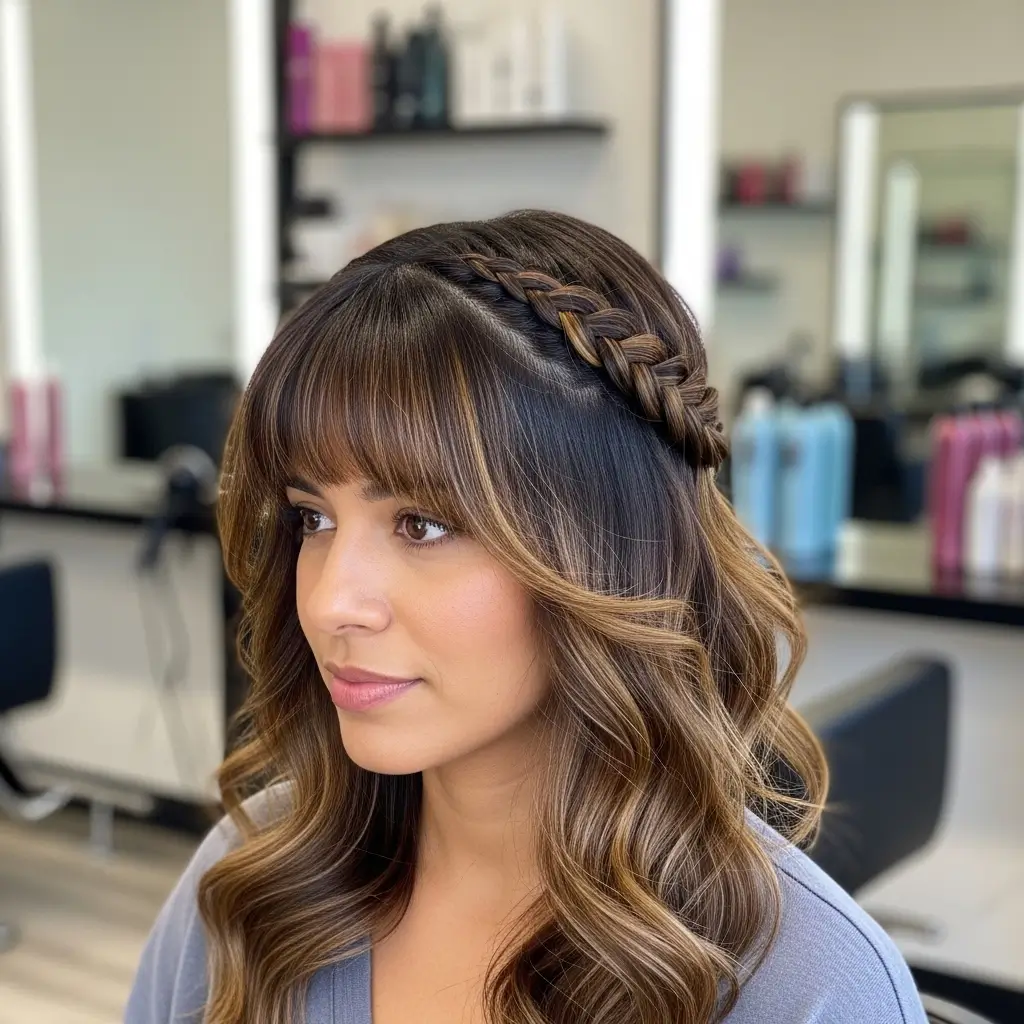
French Braid Headband

Who needs an actual headband when you can create one with your own hair? The French braid headband is perfect for growing out bangs, keeping hair out of your face during workouts, or just adding a romantic touch to any hairstyle.
Start the braid at one ear, French braiding along your hairline toward the opposite ear. The trick is keeping the braid tight enough to stay put but not so tight that you get a headache. Nobody wants a hairstyle that doubles as a torture device.
Add hair only from the front section as you braid across. This creates that headband effect while leaving the rest of your hair free.
Once you reach the opposite ear, you can either secure it with a bobby pin or continue braiding and pin it behind your ear.
What I love about this style is its versatility. Leave the rest of your hair down, throw it in a ponytail, or create a bun – the French braid headband works with everything. It’s basically the Swiss Army knife of braided hairstyles.
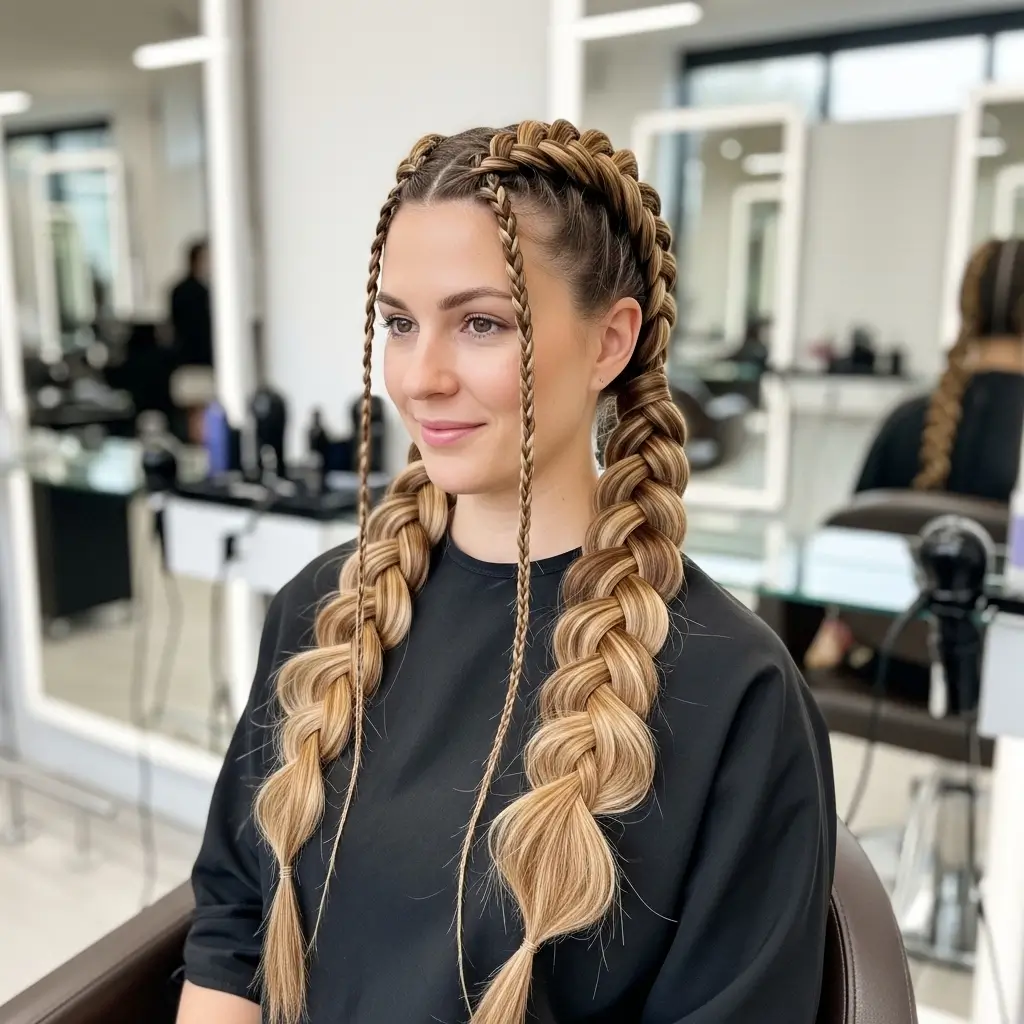
Rope Twist Ponytail
The rope twist ponytail is criminally underrated, IMO. This style takes the basic ponytail and makes it look like you actually tried, even though it’s one of the easiest techniques on this list. Plus, it stays put all day without any of that loosening drama regular ponytails love to pull.
After securing your ponytail, divide it into two equal sections. Twist each section in the same direction (clockwise or counterclockwise, pick one and stick with it).
Then wrap them around each other in the opposite direction. This opposing twist action creates the rope effect and keeps everything locked in place.
The result looks like an actual rope made of hair, which sounds weird but looks incredibly sophisticated.
The tighter you twist initially, the more defined your rope will be. But here’s a pro tip: loosen it slightly after securing the end for a fuller, more relaxed look.
Making your rope twist ponytail pop:
- Add texture spray before starting for better grip
- Keep the individual twists tight but the wrap loose
- Try a high, mid, or low placement for different vibes
- Wrap a piece of hair around the elastic for a polished finish
- Pull gently at the twists to add volume
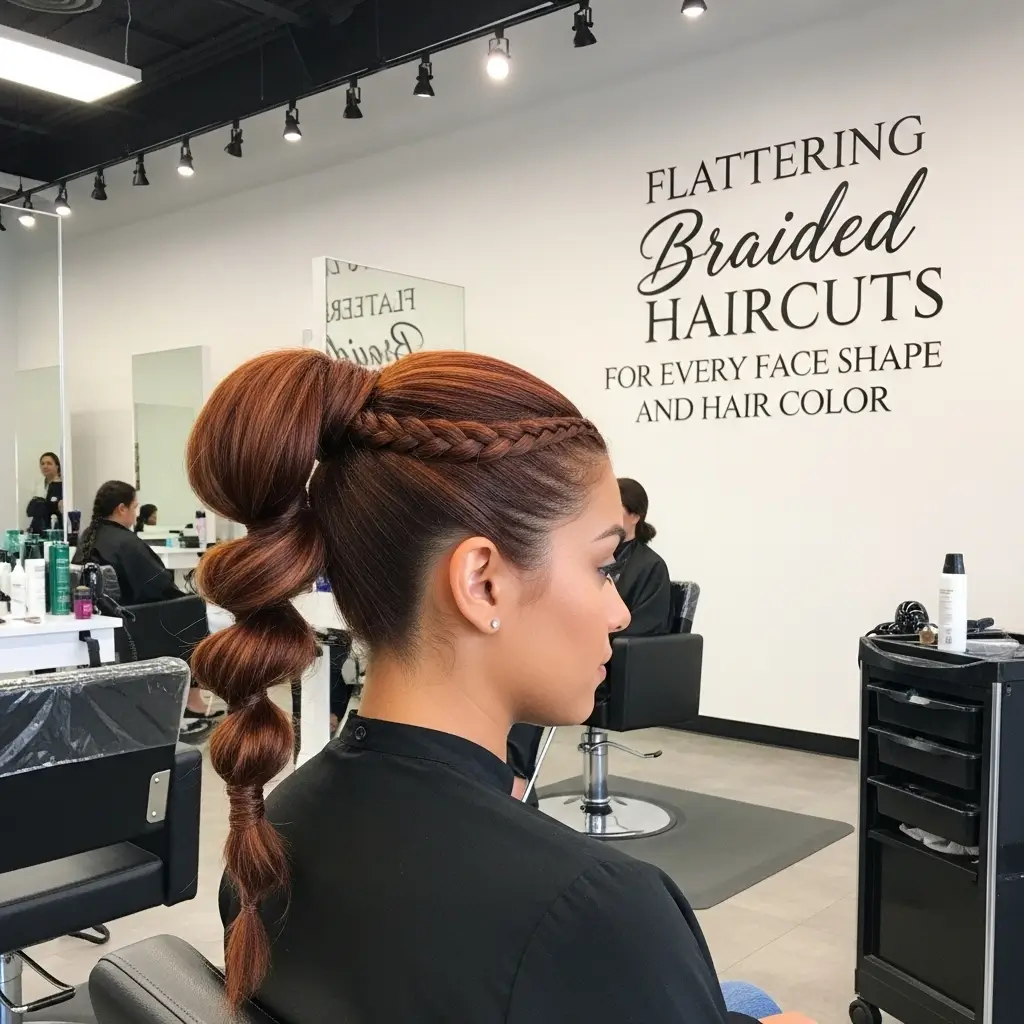
Braided Space Buns
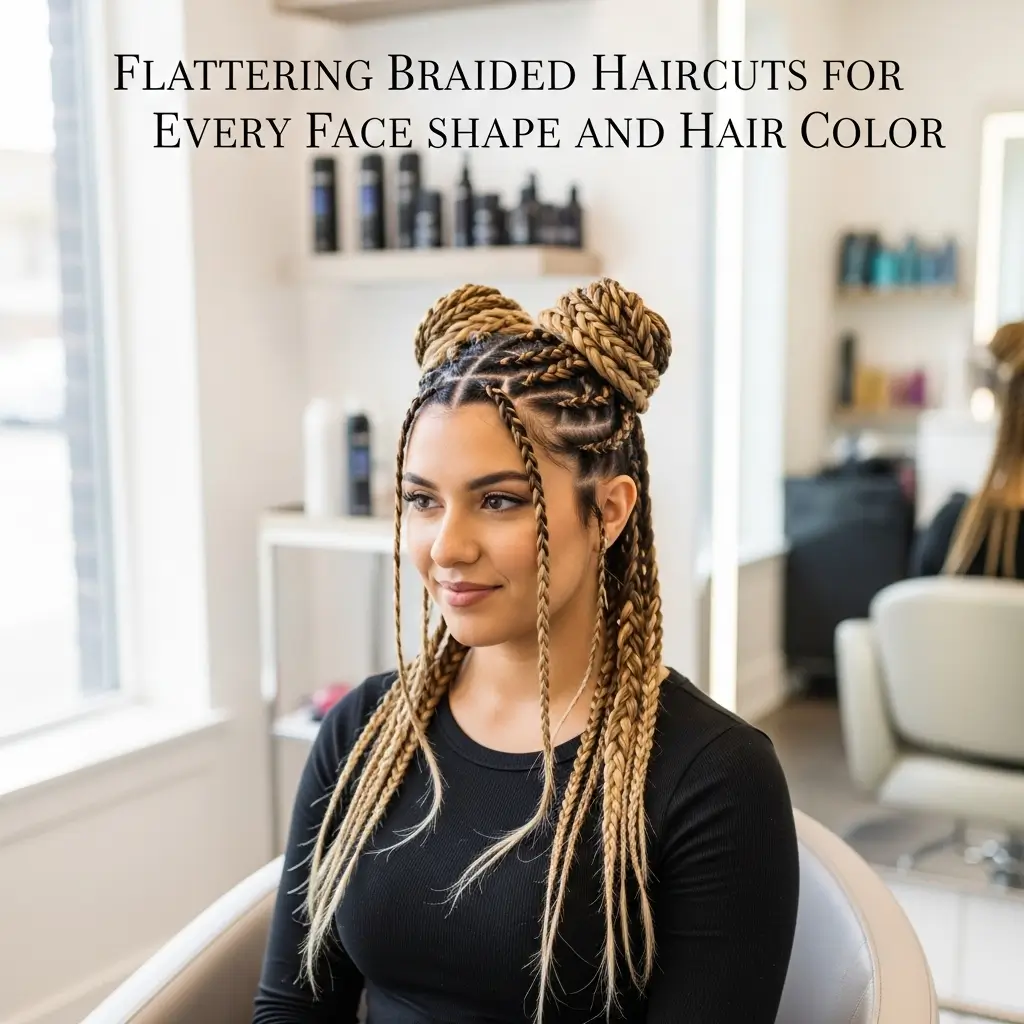
Remember when space buns were everywhere? Well, braided space buns are the evolution we didn’t know we needed.
They’re playful, they’re fun, and they make you look like you could either be heading to a rave or just really into creative hairstyling.
Start by creating two high pigtails – and I mean HIGH. Think antenna-level high. Braid each pigtail using whatever technique you prefer. I usually go for Dutch braids because they add more dimension, but regular braids work too.
Once braided, wrap each braid around its base to create the bun shape. The braiding adds texture and interest that regular space buns just can’t match.
Pin everything securely because these babies need to withstand some serious dancing (or just, you know, existing).
Leave some pieces loose around your face for that effortlessly cool vibe. The contrast between the structured braided buns and soft, loose pieces creates the perfect balance. Just don’t overthink it – space buns are supposed to be fun!
Criss-Cross Braided Updo
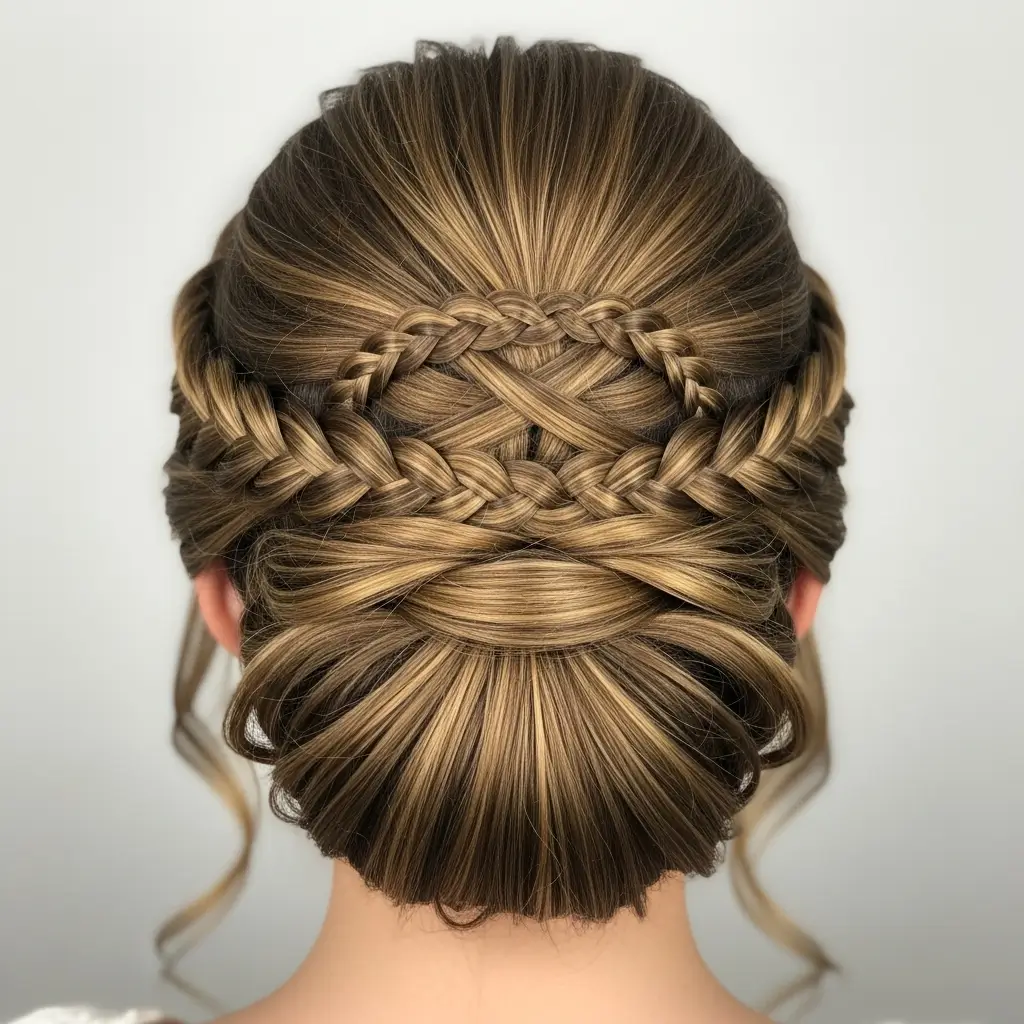
The criss-cross braided updo is what happens when you can’t decide which braid to do, so you do them all.
This style creates an intricate pattern on the back of your head that looks like it took hours but actually comes together pretty quickly once you know the technique.
Start by sectioning your hair into multiple parts – usually four to six sections work best. Braid each section individually, keeping them relatively loose.
Now comes the fun part: start crossing these braids over each other, creating a woven pattern on the back of your head.
Pin each intersection as you go, building up the criss-cross pattern. The beauty is that there’s no wrong way to do this – every pattern ends up looking intentional and gorgeous. Tuck the ends under and pin them securely.
This style works incredibly well for formal events but can also be dressed down for everyday wear. The first time I wore this to a wedding, I had three people ask for my hairstylist’s contact. Little did they know, the stylist was just me and a YouTube tutorial :/
Braided Bang Illusion
Don’t have bangs but want them for a day? The braided bang illusion is your ticket to temporary fringe without the commitment (or the growing-out phase nightmare).
This clever technique uses braiding to create the appearance of bangs while keeping your actual hair length intact.
Take a section from your part, about 2-3 inches wide, and begin braiding it forward toward your forehead instead of back.
The braid should sit right where bangs would naturally fall. This forward direction is crucial – it’s what creates the illusion.
Secure the braid at the length where you want your “bangs” to end, then tuck and pin the tail under and behind the braid.
The result? It looks like you have a decorative braid incorporated into actual bangs. Mind-blowing, right?
The best part about this style is that it’s completely temporary. You can test-drive the bang life without any scissors involved. Plus, it adds an unexpected element to any hairstyle that makes people do a double-take.
Sleek Triple Strand Braid
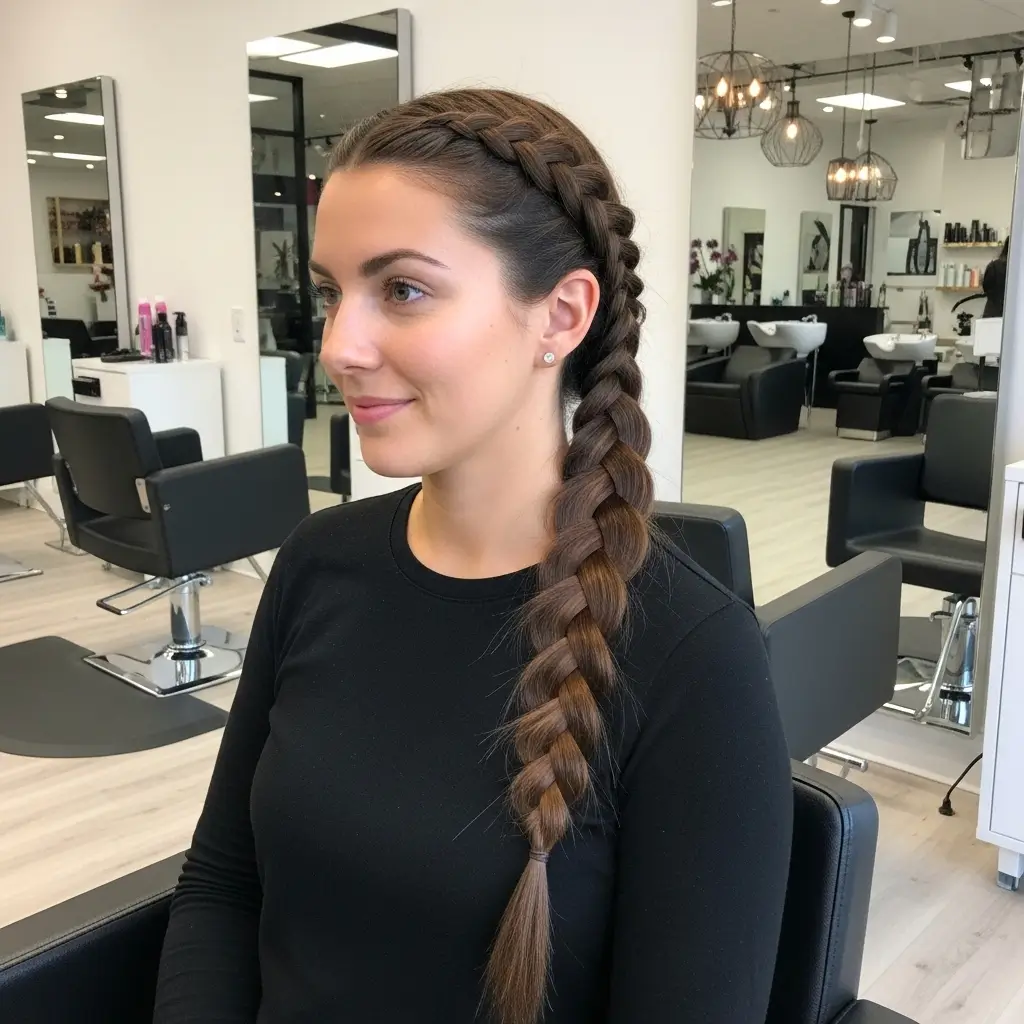
Sometimes you need to bring it back to basics, and the sleek triple strand braid is the ultimate classic-with-a-twist style.
This isn’t your elementary school braid – this is its sophisticated older sister who has her life together and probably does yoga.
The key word here is sleek. Start with completely smooth, straight hair. Use a smoothing serum and flat iron if necessary because any bumps or waves will show. Create a low ponytail and braid it with perfect, even tension throughout.
What elevates this from basic to brilliant is the finishing. Keep the braid tight and uniform, no pulling or tugging for volume here.
Wrap a small section of hair around the elastic, secure the end the same way, and finish with shine spray for that glossy, editorial look.
This style proves that simple doesn’t mean boring. When executed perfectly, a sleek triple strand braid looks expensive and intentional. It’s my go-to when I need to look polished but don’t have time for complexity.
Perfecting the sleek triple strand:
- Use a fine-tooth comb to smooth each section as you braid
- Keep your hands close to the braid for better control
- Apply light holding spray as you work
- Trim any split ends before starting – they’ll show
- Finish with anti-humidity spray to maintain sleekness
Final Thoughts
So there you have it – 15 braided hairstyles that’ll completely transform your hair game. Each style brings something different to the table, from the effortless cool of messy fishtails to the polished perfection of sleek triple strands.
The best part? Once you master these techniques, you can mix and match elements to create your own signature looks.
Remember, nobody nails these styles on the first try. I certainly didn’t – my early attempts at Dutch crown braids looked more like I’d been electrocuted than styled.
But that’s part of the journey. Every wonky braid teaches you something, and before you know it, you’ll be braiding without even looking in a mirror.
Don’t be afraid to make these styles your own. Add accessories, play with texture, combine different techniques – hair is meant to be fun! And honestly? Some of my favorite looks have come from happy accidents when I was just messing around.
The braided hairstyle world is your oyster, so grab those elastics and start experimenting. Your hair will thank you, and your Instagram feed definitely will too.